Exonita POS · Restaurant · Cashier guide
Cashier
Open your till, take dine-in and pickup orders, send them to the kitchen, take payment, check your bills and close your till at the end of your shift.
What you can do
- Take dine-in, pickup and delivery orders
- Send orders to the kitchen (KOT)
- Take cash, card, UPI and wallet payments, or split a payment
- See today's bills and cancel a bill if needed
- Open and close your own till and check your sales in My Shift
Ask your administrator
- If the counter says This device isn't registered as a billing terminal, ask your administrator to register it.
- If Open Till says it couldn't open the till, the previous business day may still be open. Ask your administrator to close it in Day Close.
- Closing the business day, reports, stock and menu changes are done by your administrator.
Your administrator can change what your login can see. If a button in this guide is missing for you, ask them.
Your day at a glance
Task 1
Sign in
Open your workspace with your own login.
WhereYour web browser
-
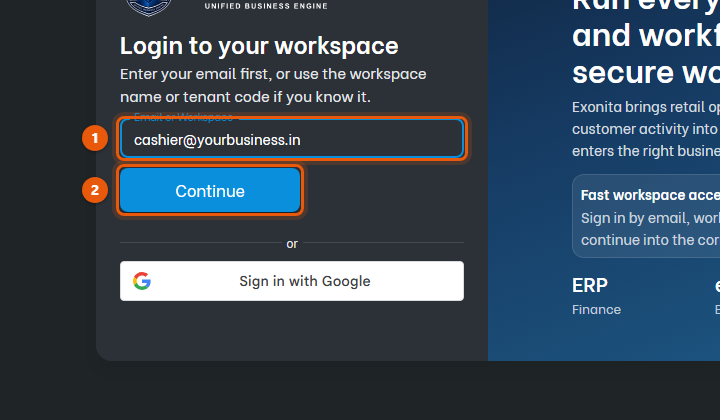
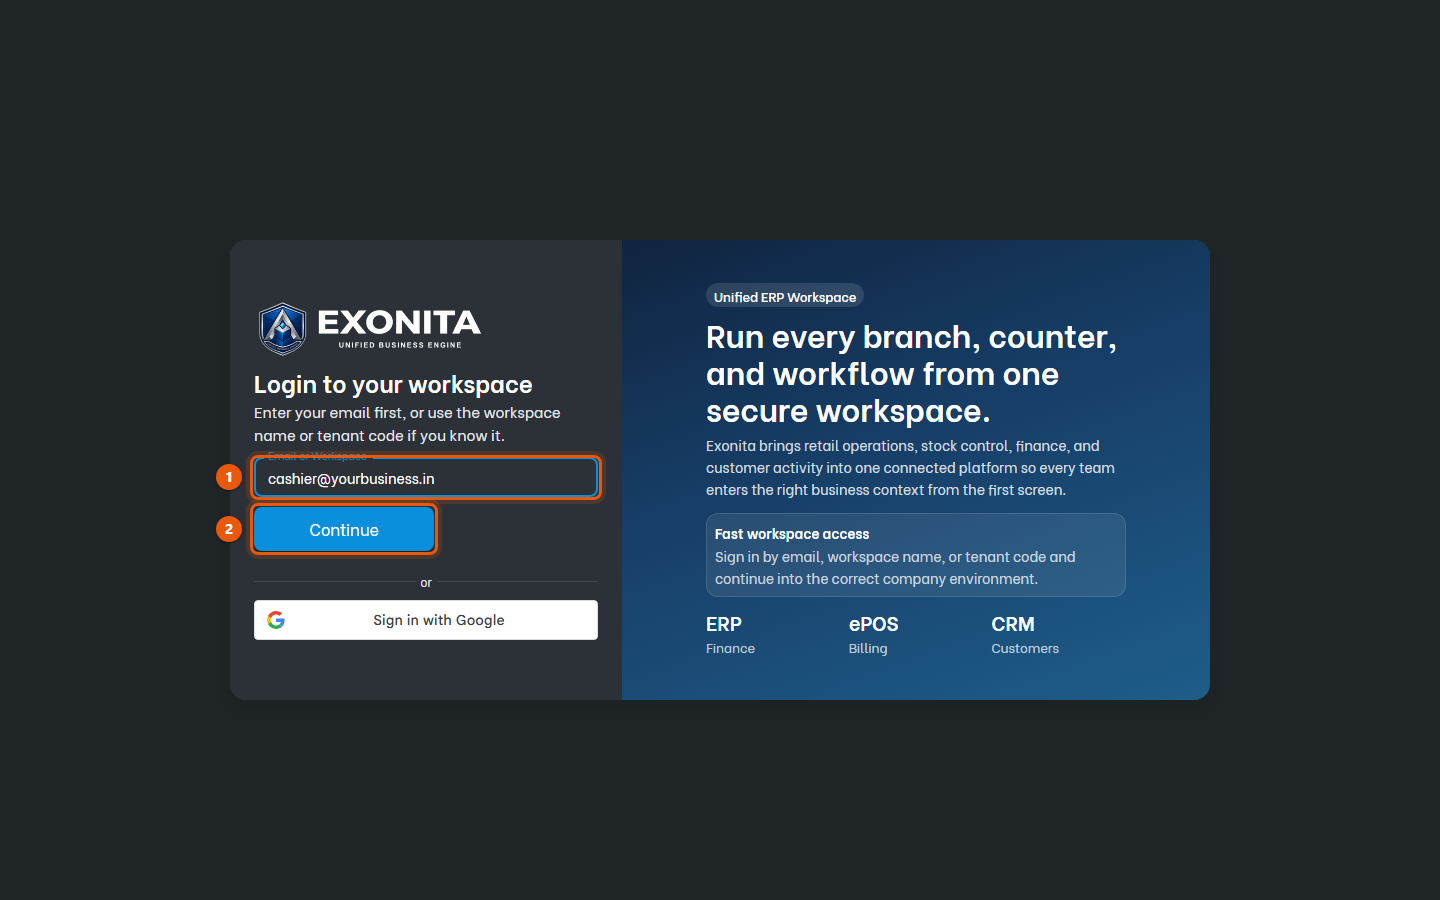
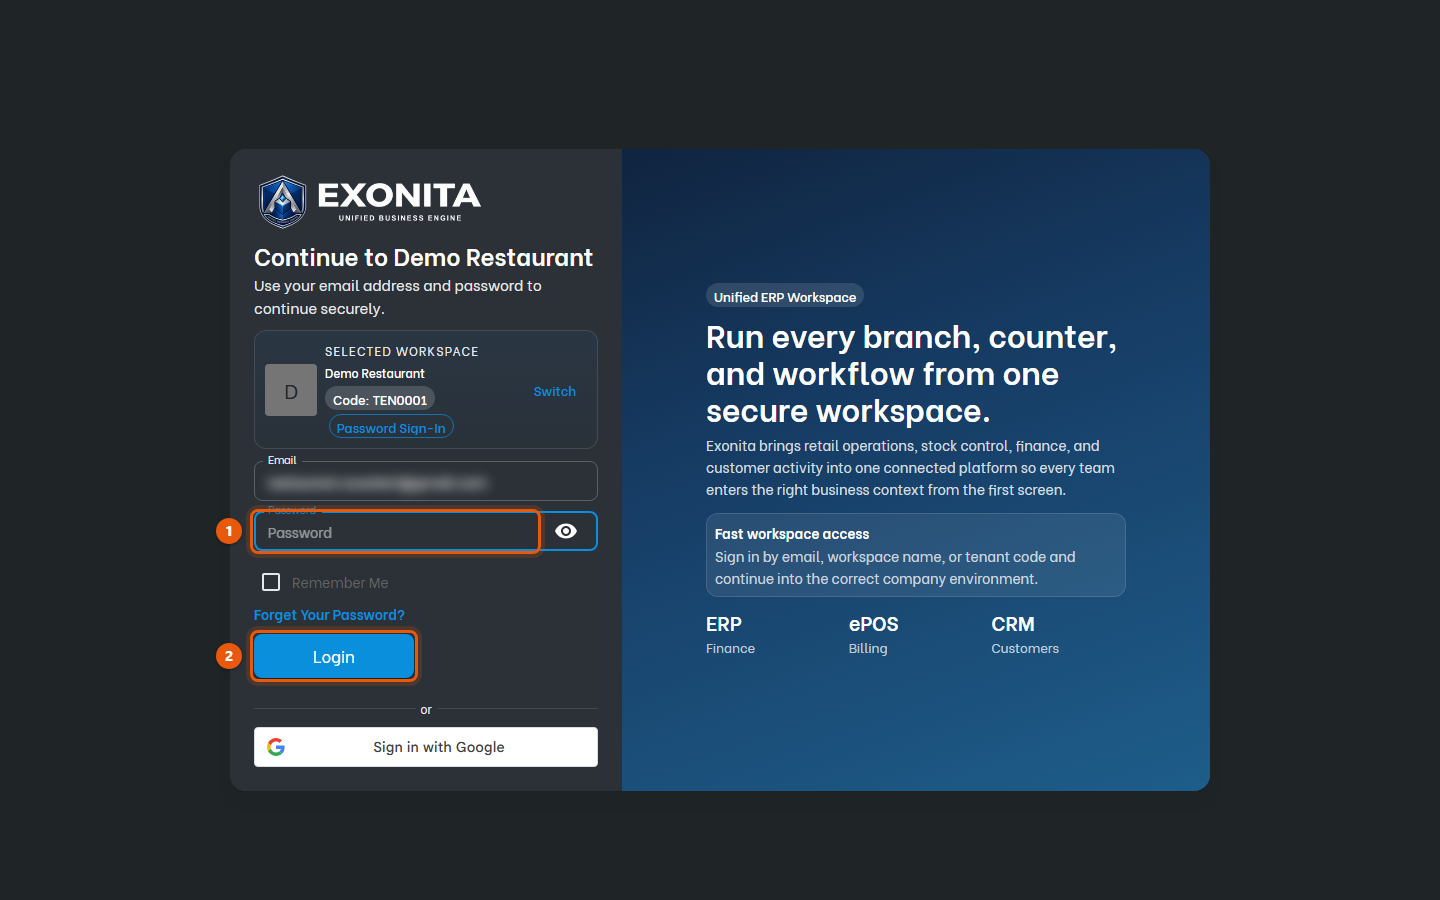
Open the address your administrator gave you. Enter your email in Email or Workspace, then select Continue.
You'll see: The password screen opens with your business name.
-
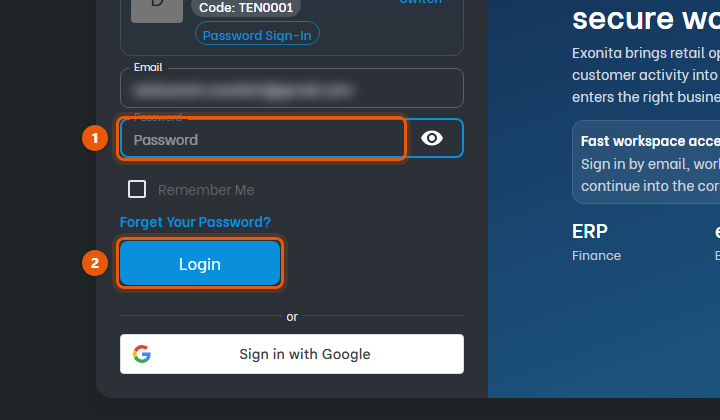
Enter your Password and select Login.
You'll see: The restaurant counter opens.
TipAlways sign in with your own login. Every bill is recorded under your name. If you see Signed in on too many devices, sign out a device you no longer use, or ask your administrator.
Task 2
Open your till
Start your shift by counting the cash already in your drawer.
WhereRestaurant counter
-
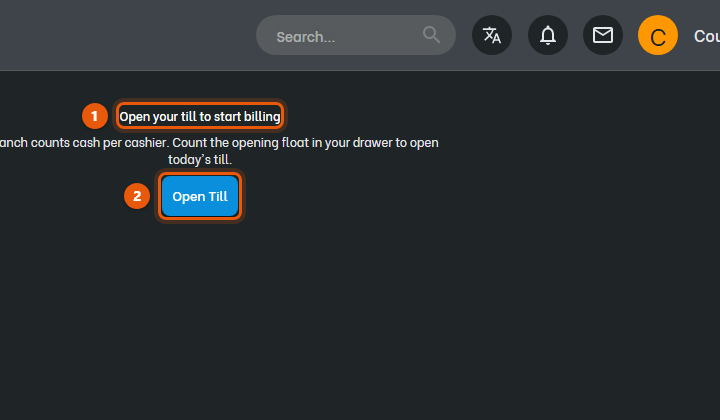
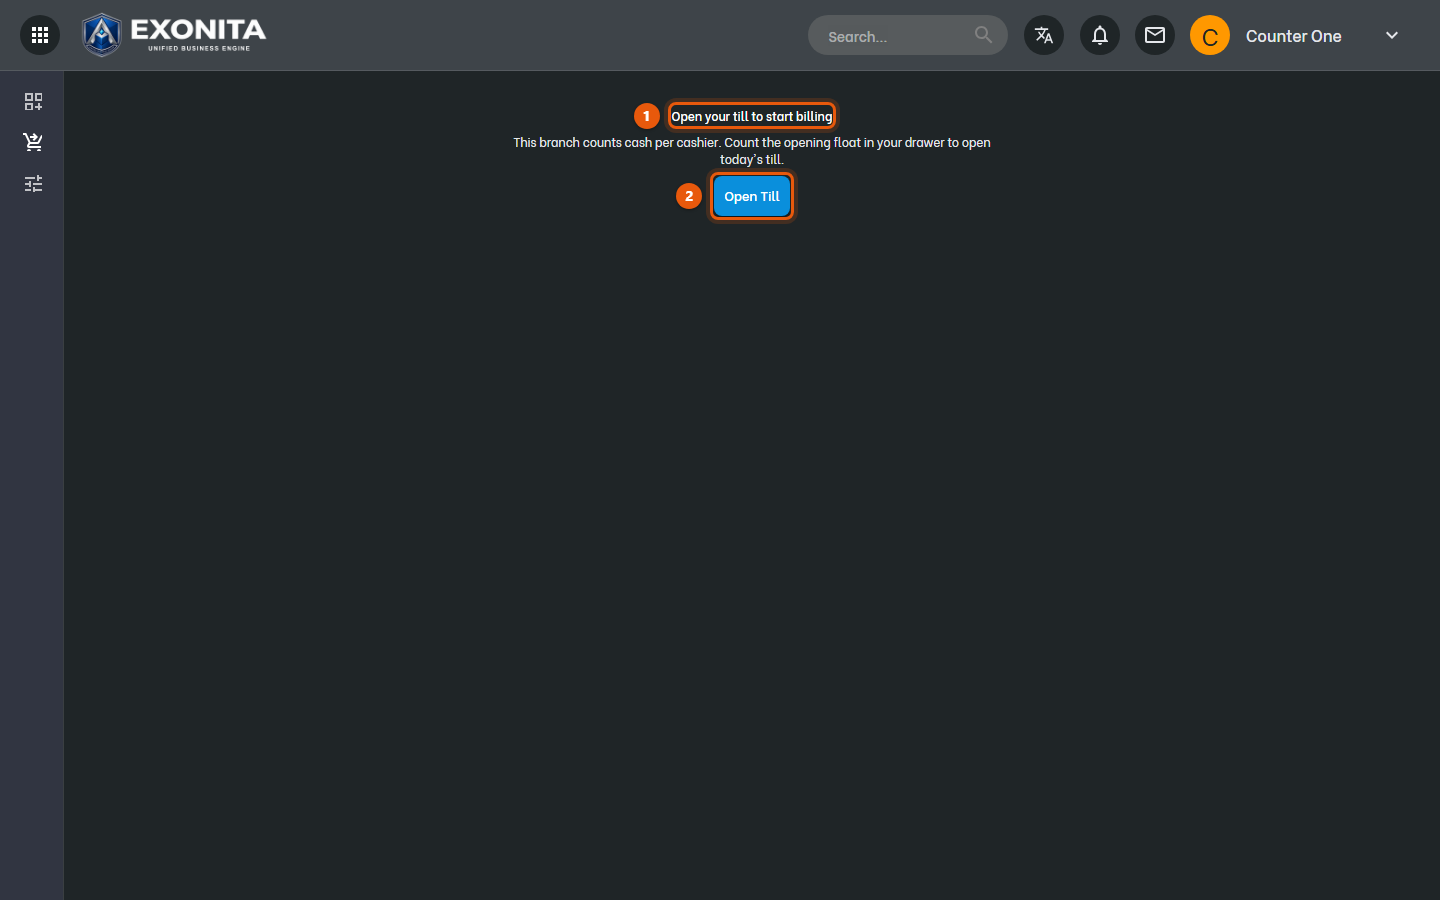
After you sign in, the restaurant counter opens and asks you to open your till. Select Open Till.
You'll see: The Open till window opens.
-
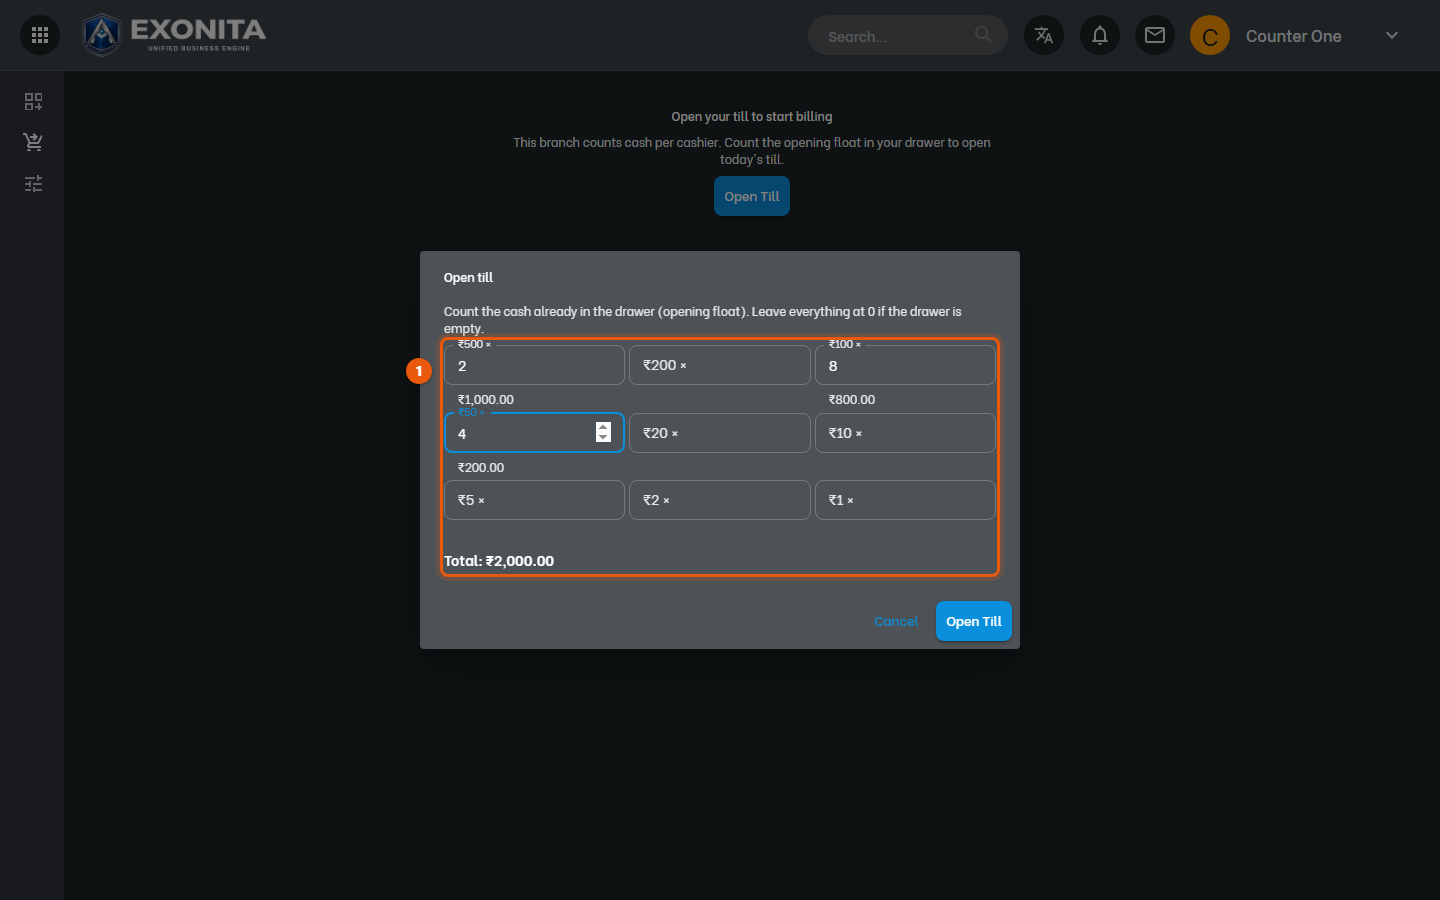
Count the cash in your drawer and enter how many of each note and coin you have. Leave everything at 0 if the drawer is empty.
You'll see: Total shows your opening cash.
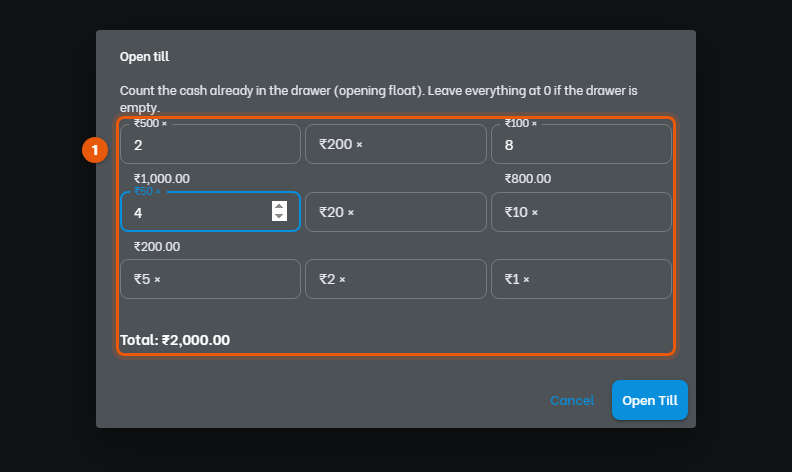
ImportantCount carefully. When you close your till, the system compares your drawer with this amount plus the cash you collected.
-
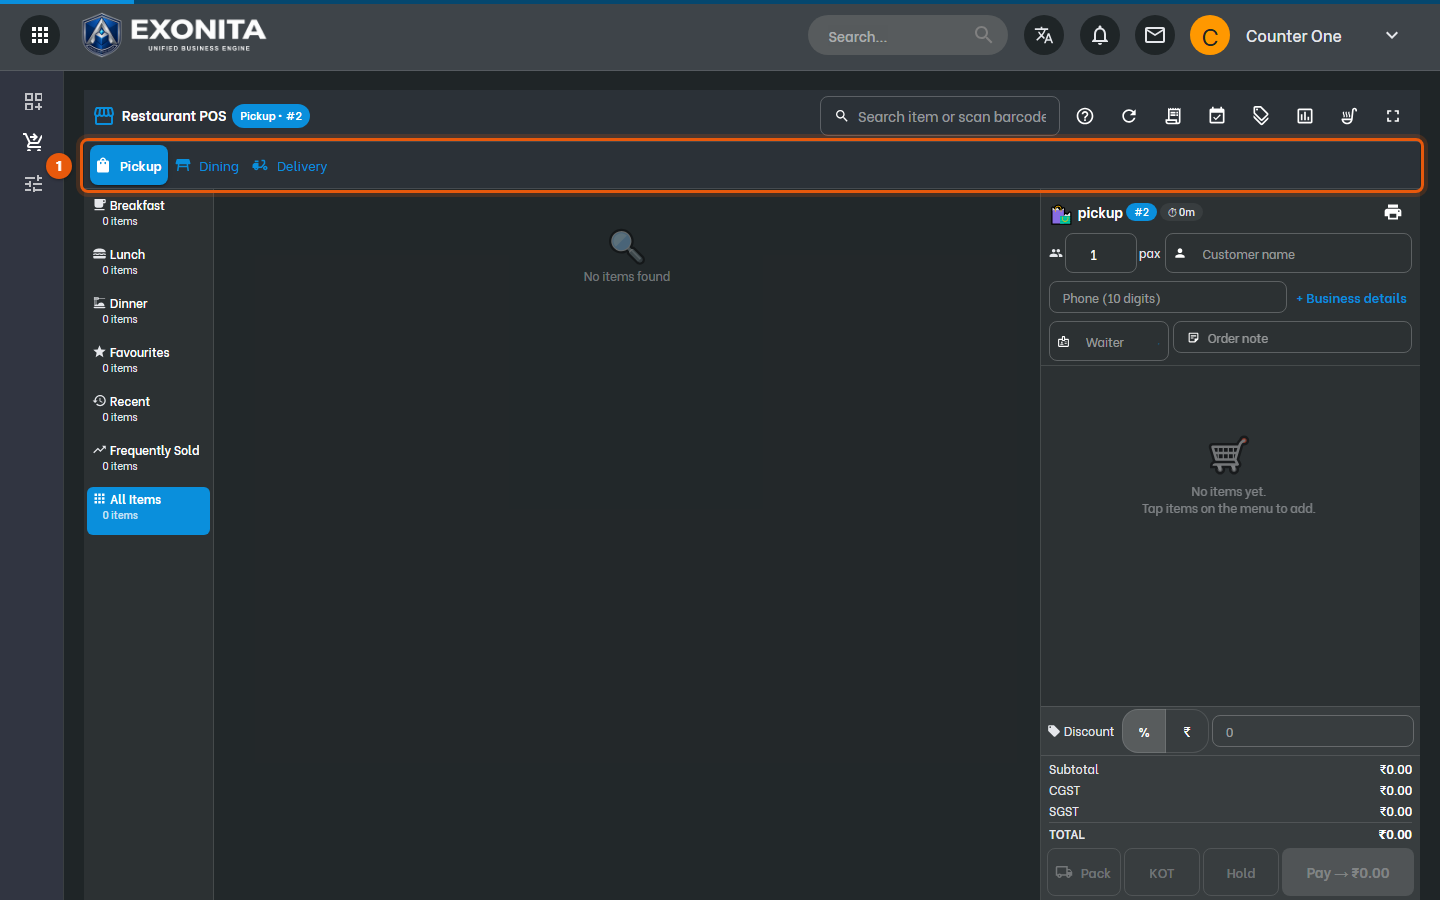
Select Open Till.
You'll see: The counter is ready for orders.
Task 3
Take a dine-in order
Open a table and add what the guests ordered.
WhereRestaurant counter → Dining
-
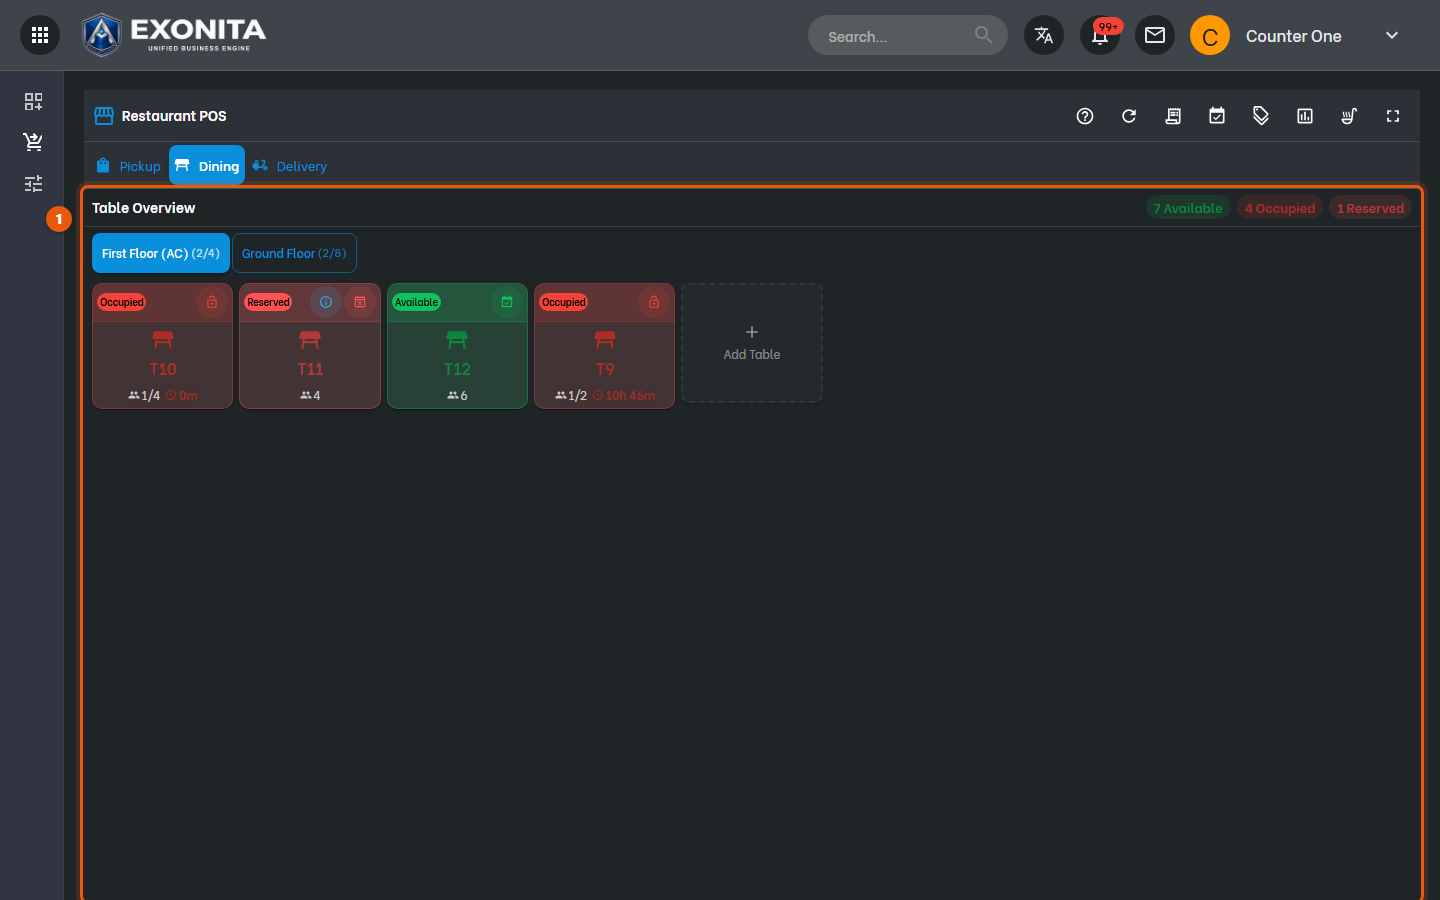
Select Dining.
You'll see: Table Overview shows your tables by floor. Available tables are green, Occupied and Reserved tables are red.
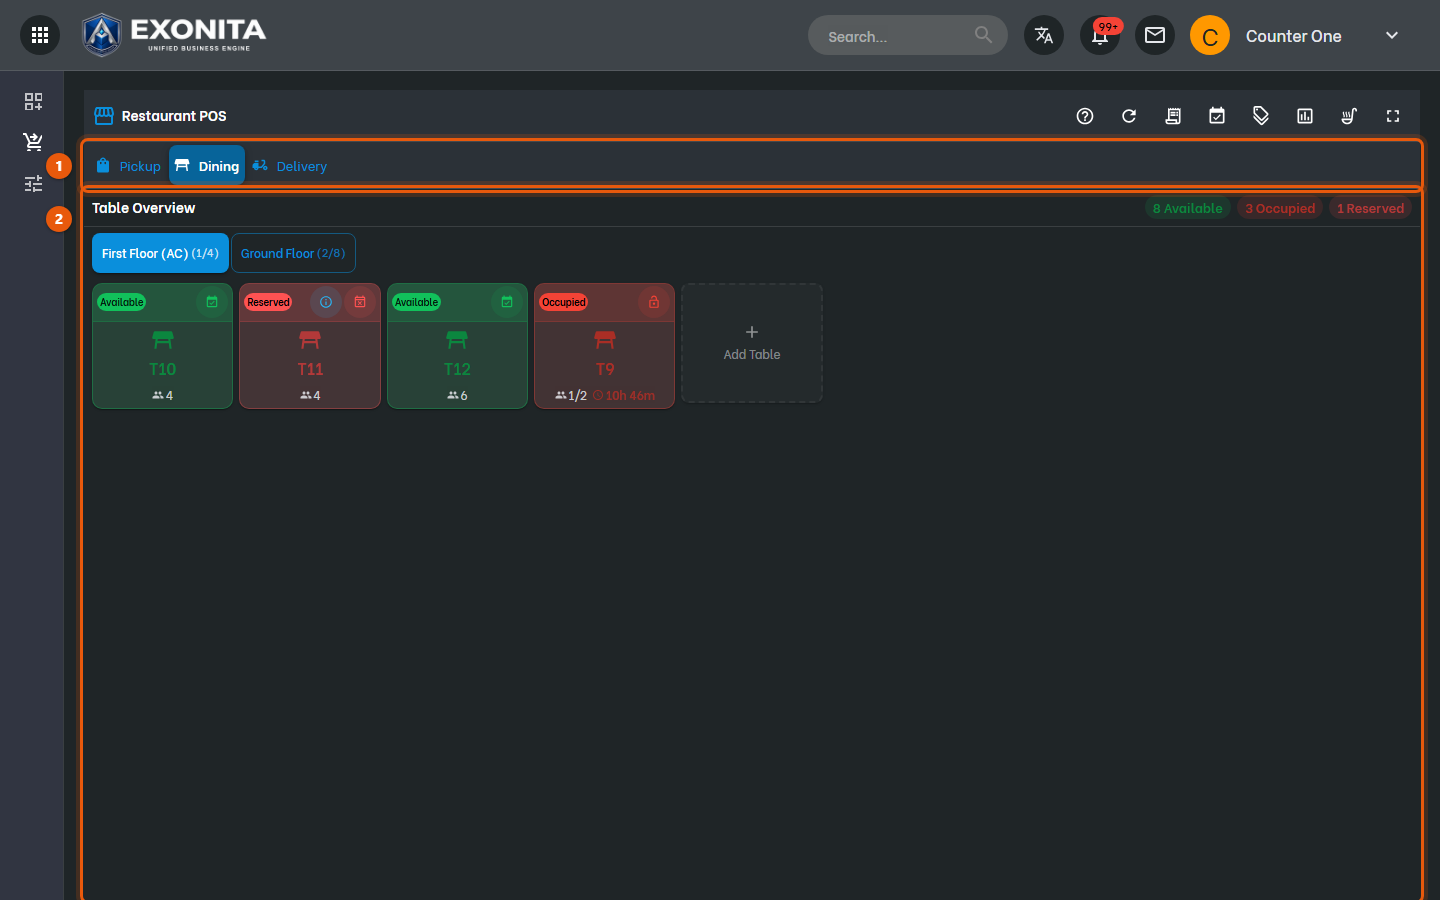
TipSelect a floor, such as Ground Floor, to see its tables.
-
Select an Available table.
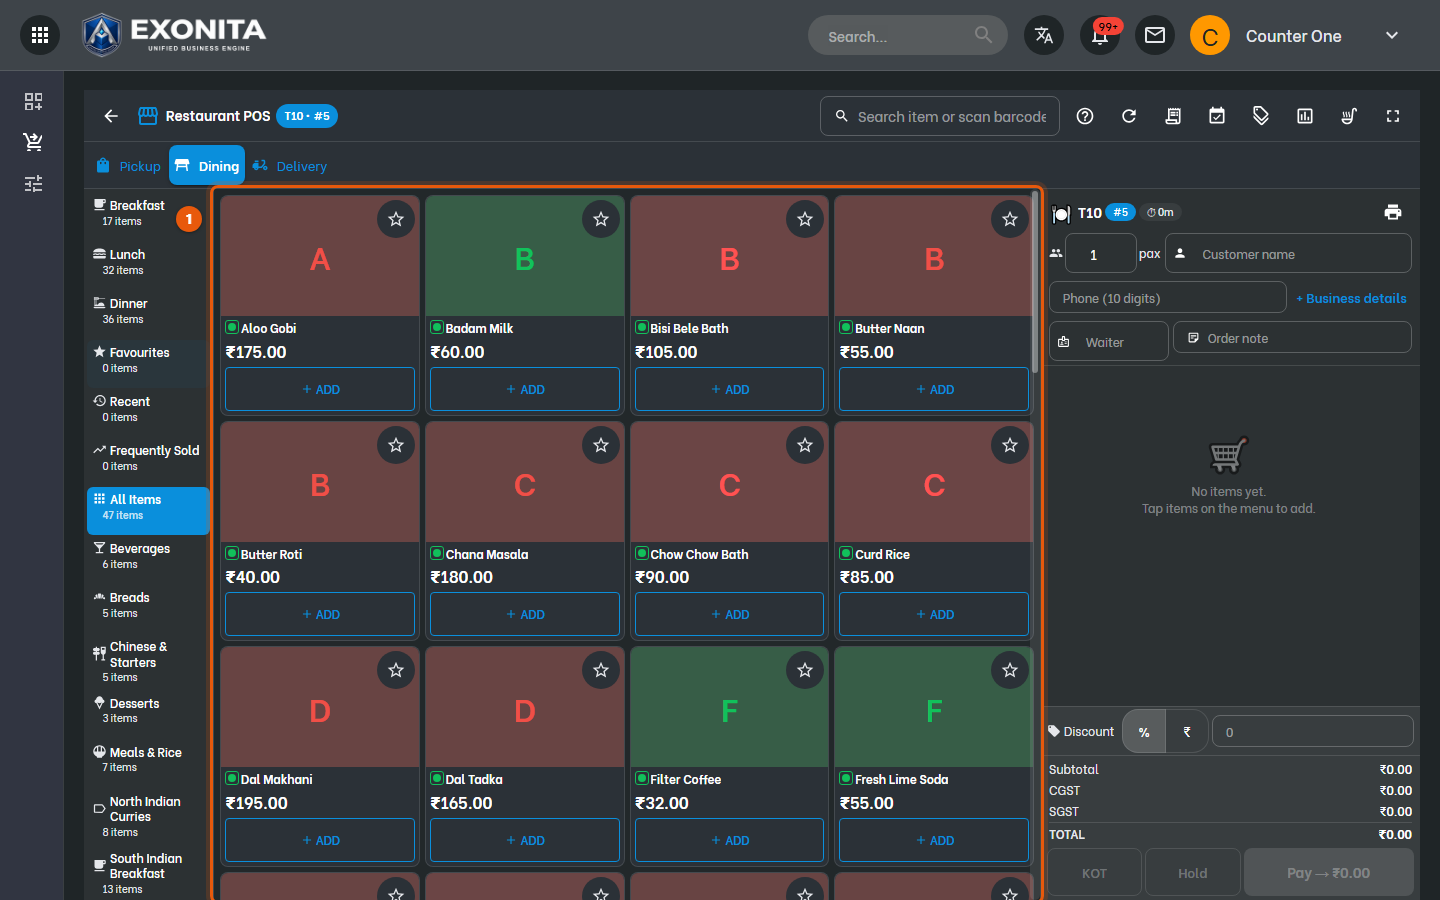
You'll see: The table's order opens, with the menu on the left and the order on the right.
-
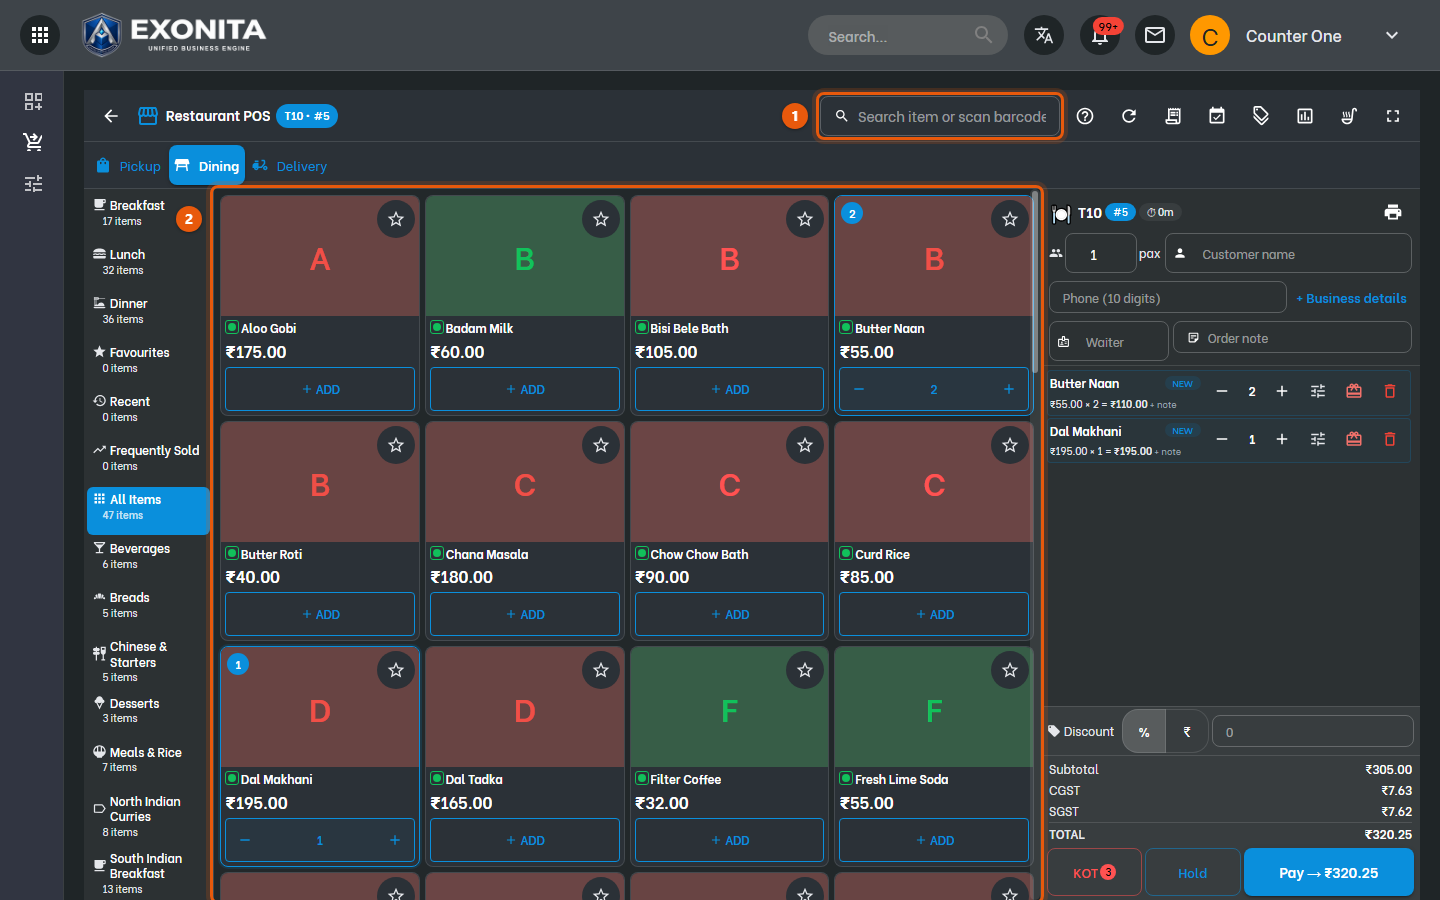
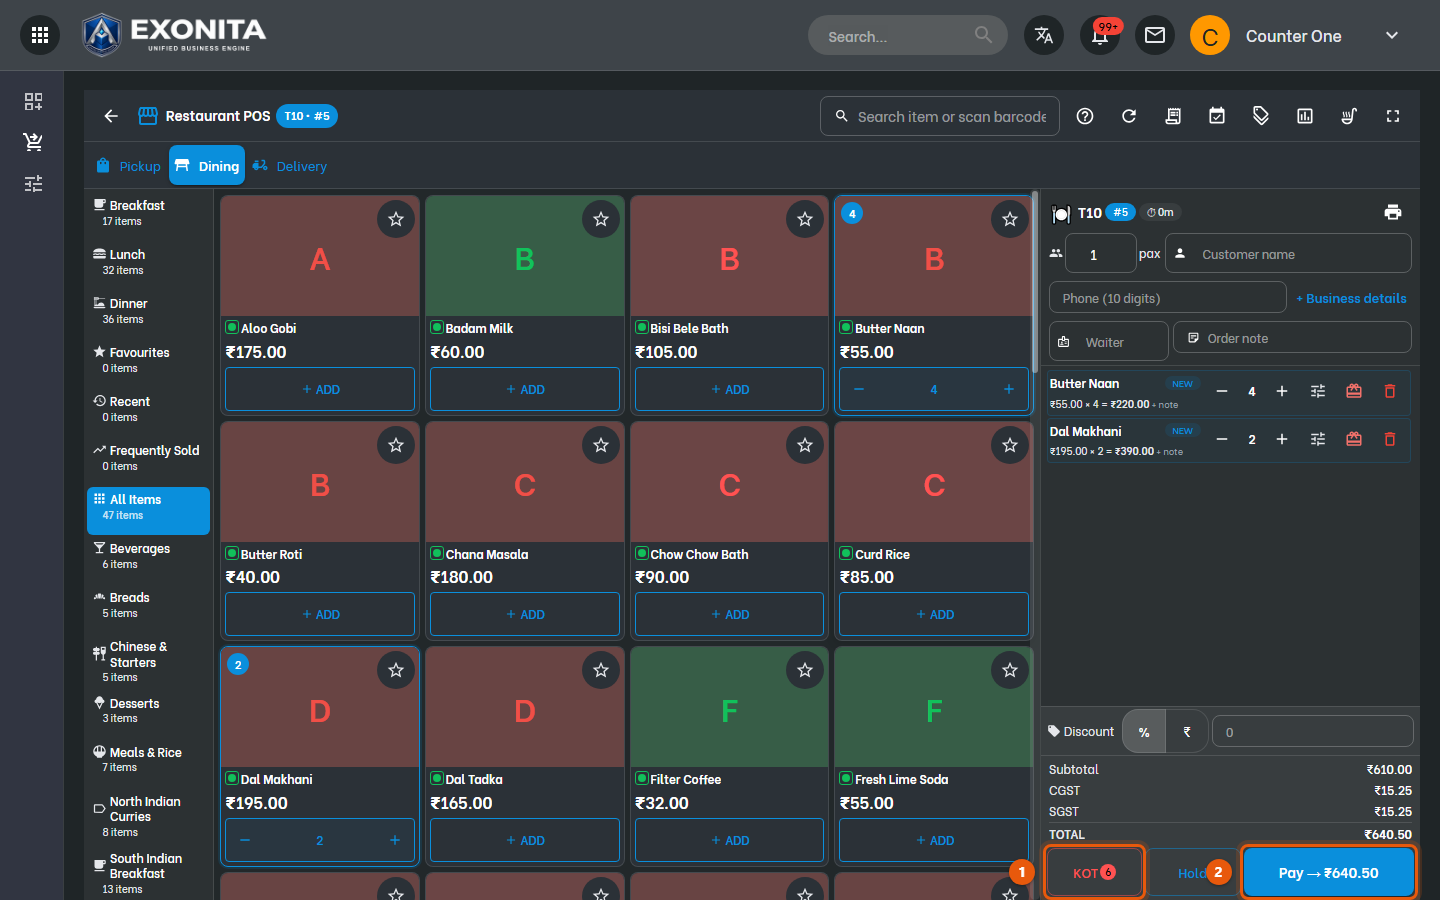
Pick a category on the left, then select + ADD on each dish. Select + to add one more. To find a dish fast, type its name in Search item or scan barcode.
You'll see: The dishes appear in the order marked NEW, with the total at the bottom.
-
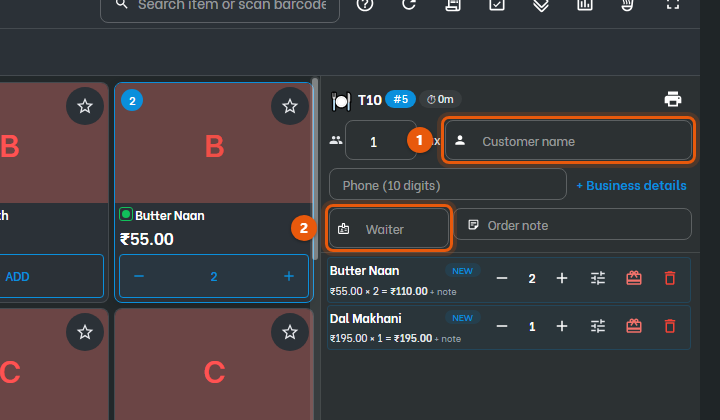
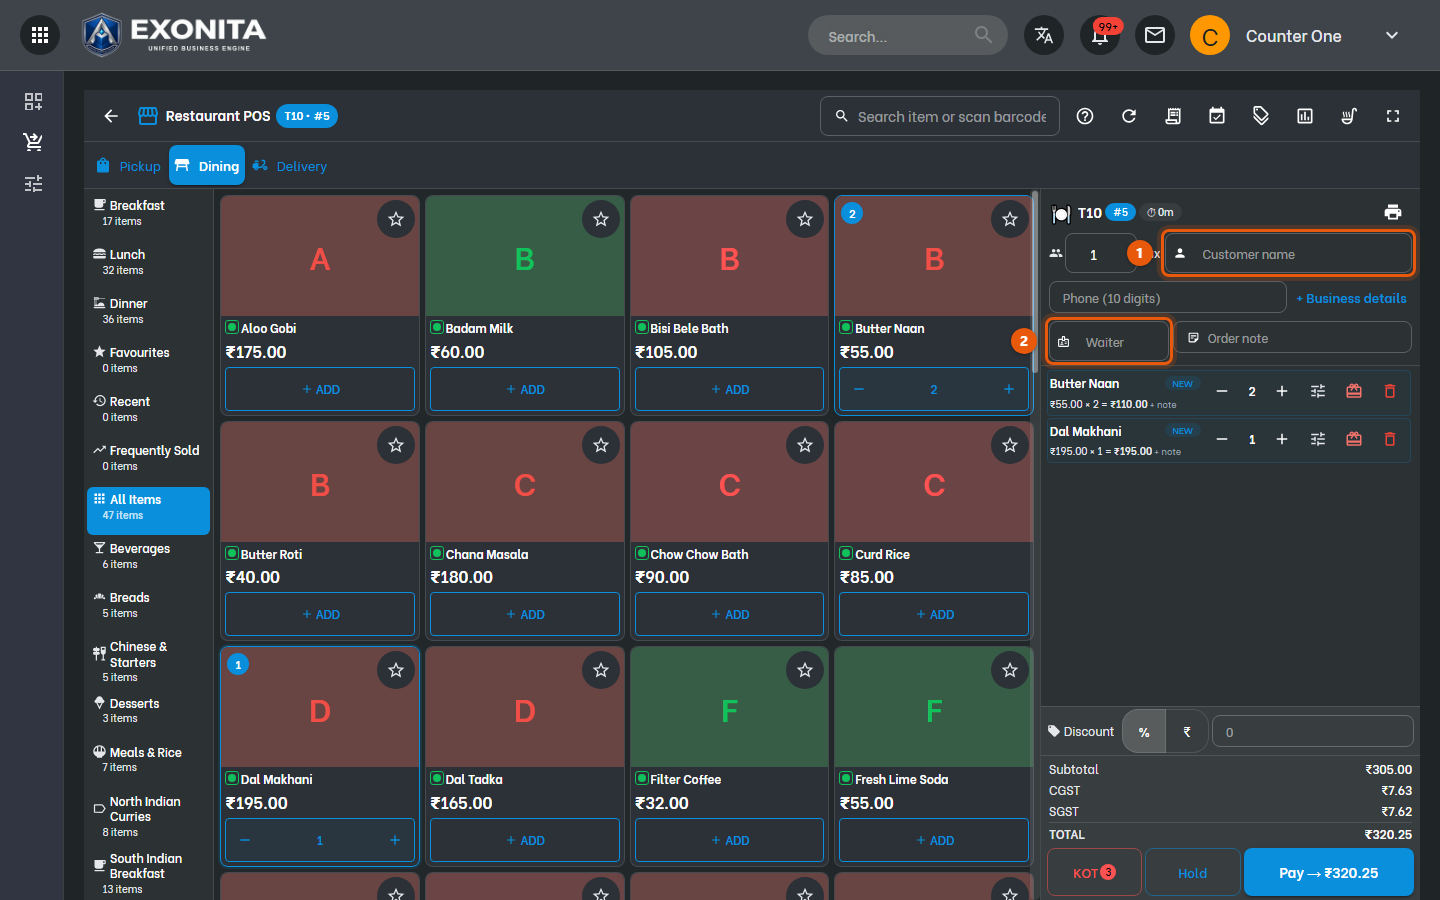
Enter the number of guests in pax. Add the customer's name or phone if they want it on the bill, and choose the Waiter serving the table.
You'll see: The details print on the bill and show in reports.
TipLeave the customer empty for walk-in guests. Use Order note for instructions to the kitchen.
Task 4
Send the order to the kitchen
Print the kitchen order ticket (KOT) for the new dishes.
WhereRestaurant counter → open table
-
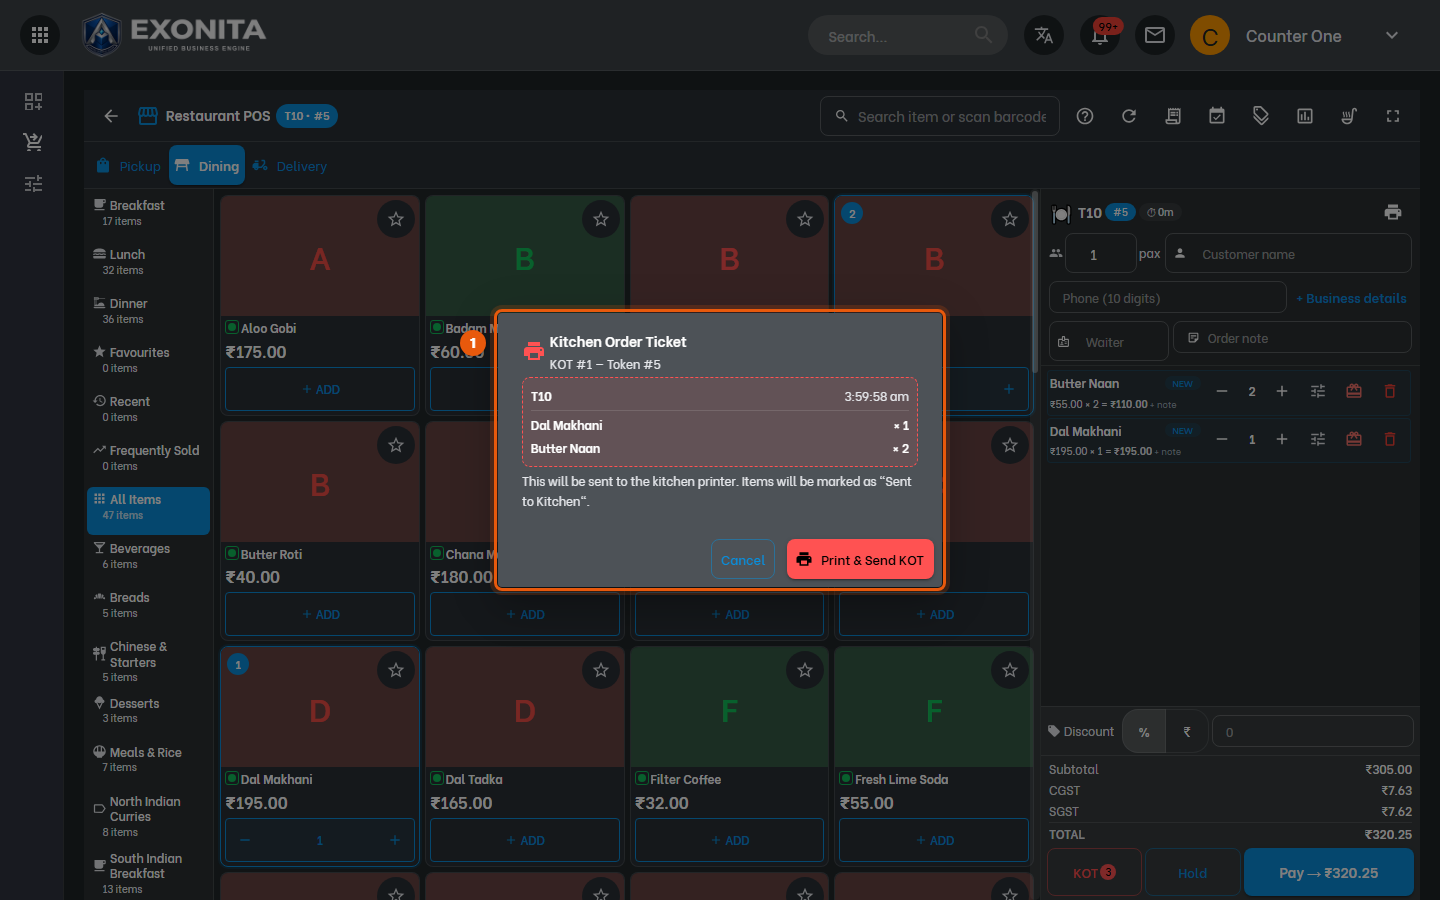
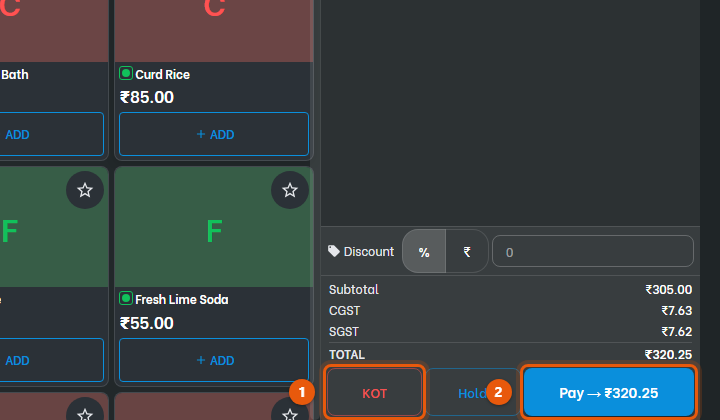
Select KOT or press F9. The number on the button is how many dishes are not sent yet.
You'll see: The Kitchen Order Ticket window shows the dishes that will go to the kitchen.
-
Select Print & Send KOT.
You'll see: The ticket prints in the kitchen and the dishes are marked as sent.
TipIf the guests order more, open the same table, add the dishes and send a KOT again. Only the new dishes go to the kitchen.
ImportantSend a KOT before you leave the table. Dishes that are not sent are kept only on this computer.
Task 5
Take payment
Settle the table when the guests are ready to pay.
WhereRestaurant counter → open table → Pay
-
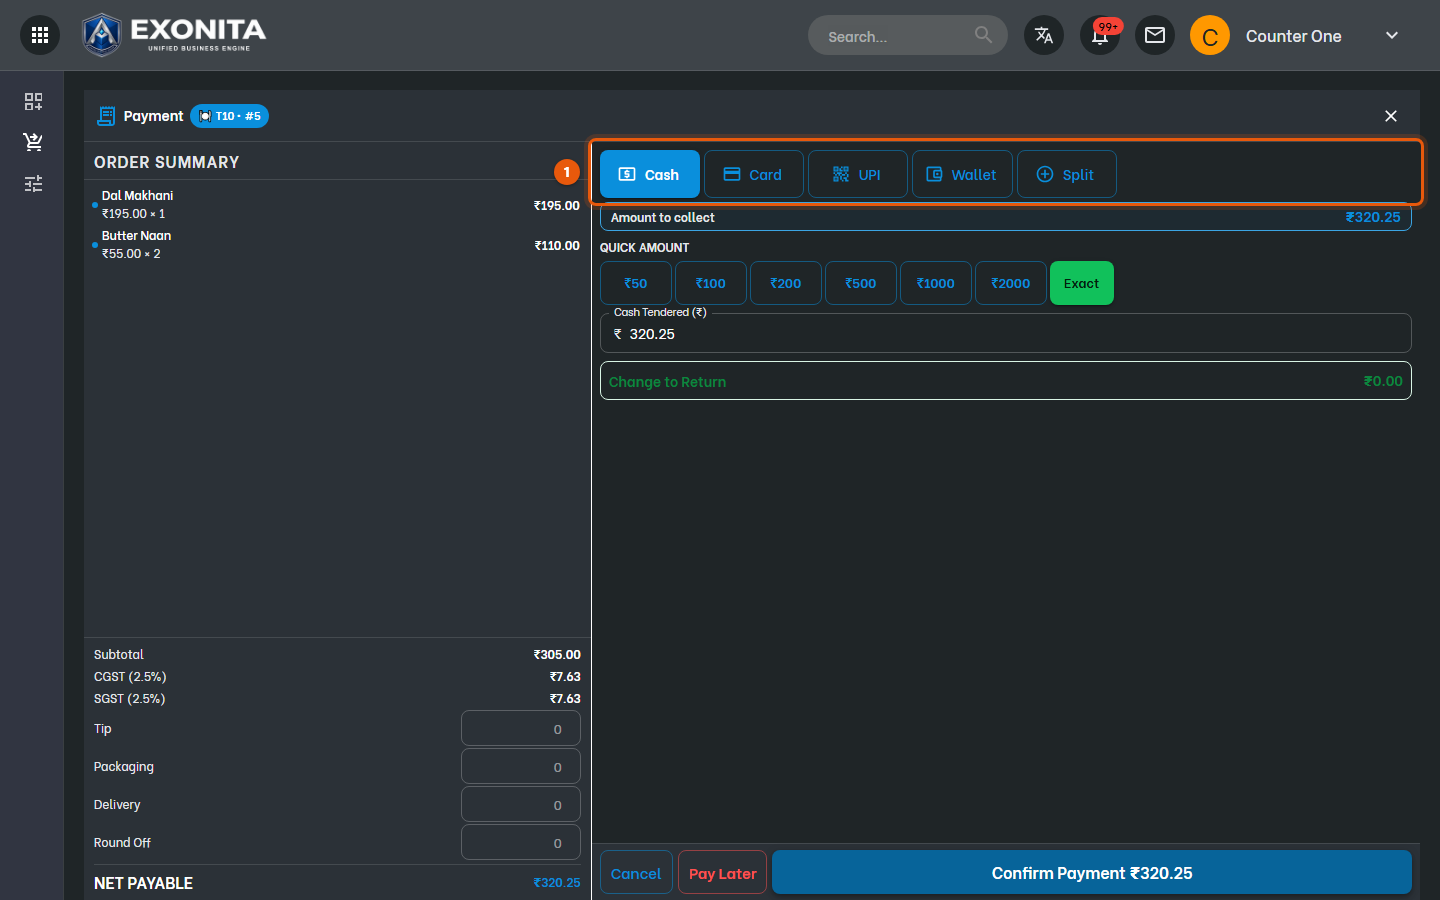
Select Pay or press F4.
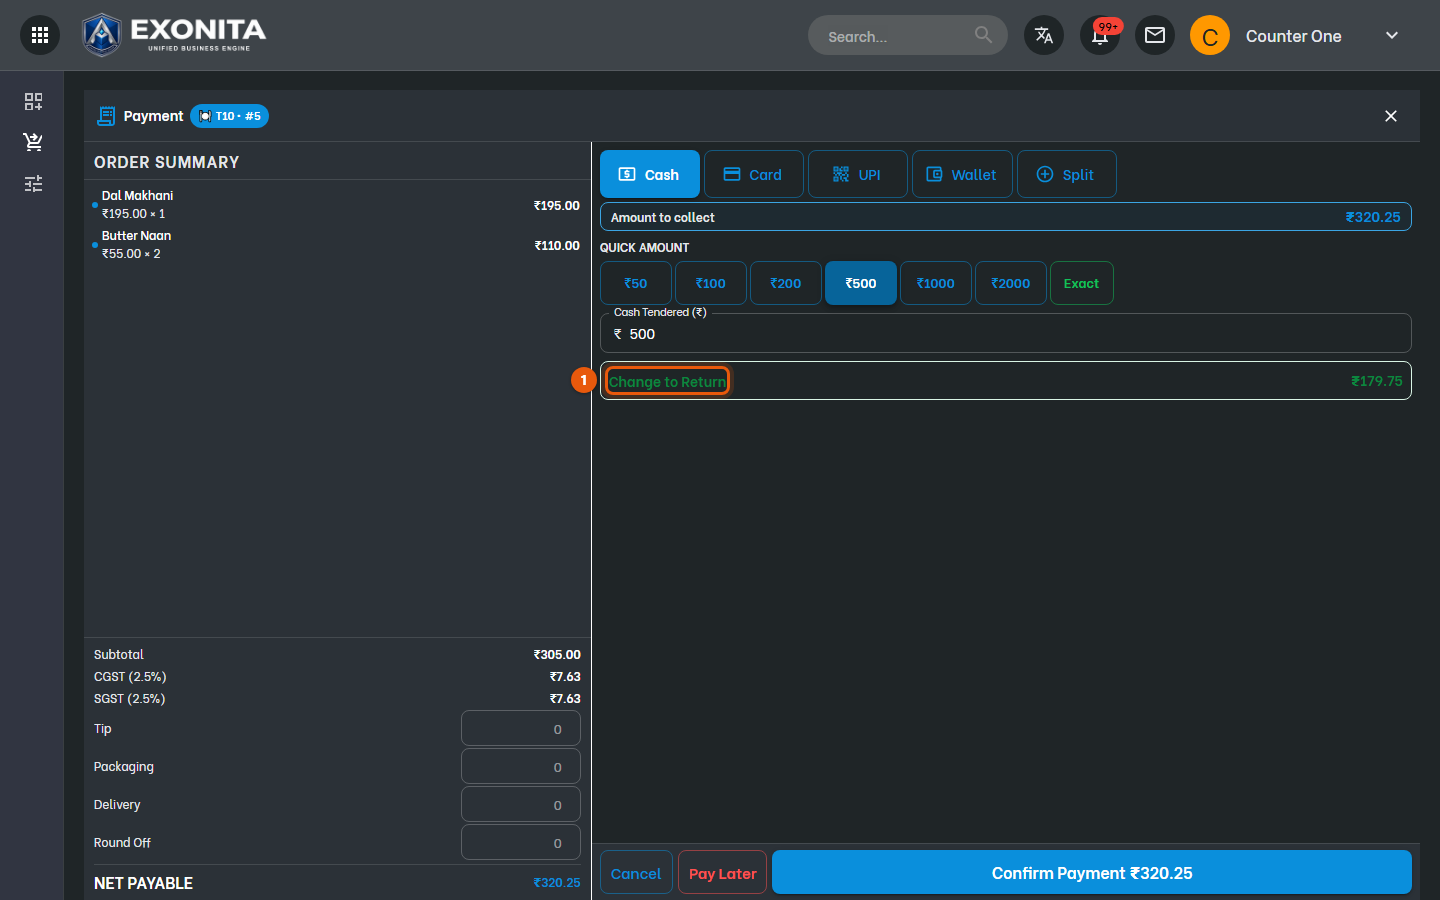
You'll see: The Payment screen shows the order summary on the left and payment modes on the right.
-
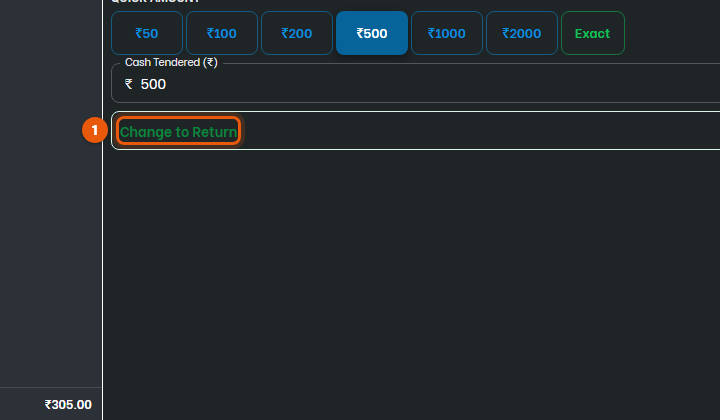
Choose Cash, Card, UPI or Wallet. For cash, select a Quick amount such as ₹500, or type what the guest gave you in Cash Tendered.
You'll see: Change to Return shows how much to give back.
TipTo take part in cash and part by card, select Split. Add tip, packaging or delivery charges on the left.
-
Select Confirm Payment.
You'll see: The bill is posted and printed, and the table is Available again.
ImportantCheck the amount before you confirm. A posted bill can be cancelled, but not edited.
Task 6
Take a pickup order
Bill a takeaway order without a table.
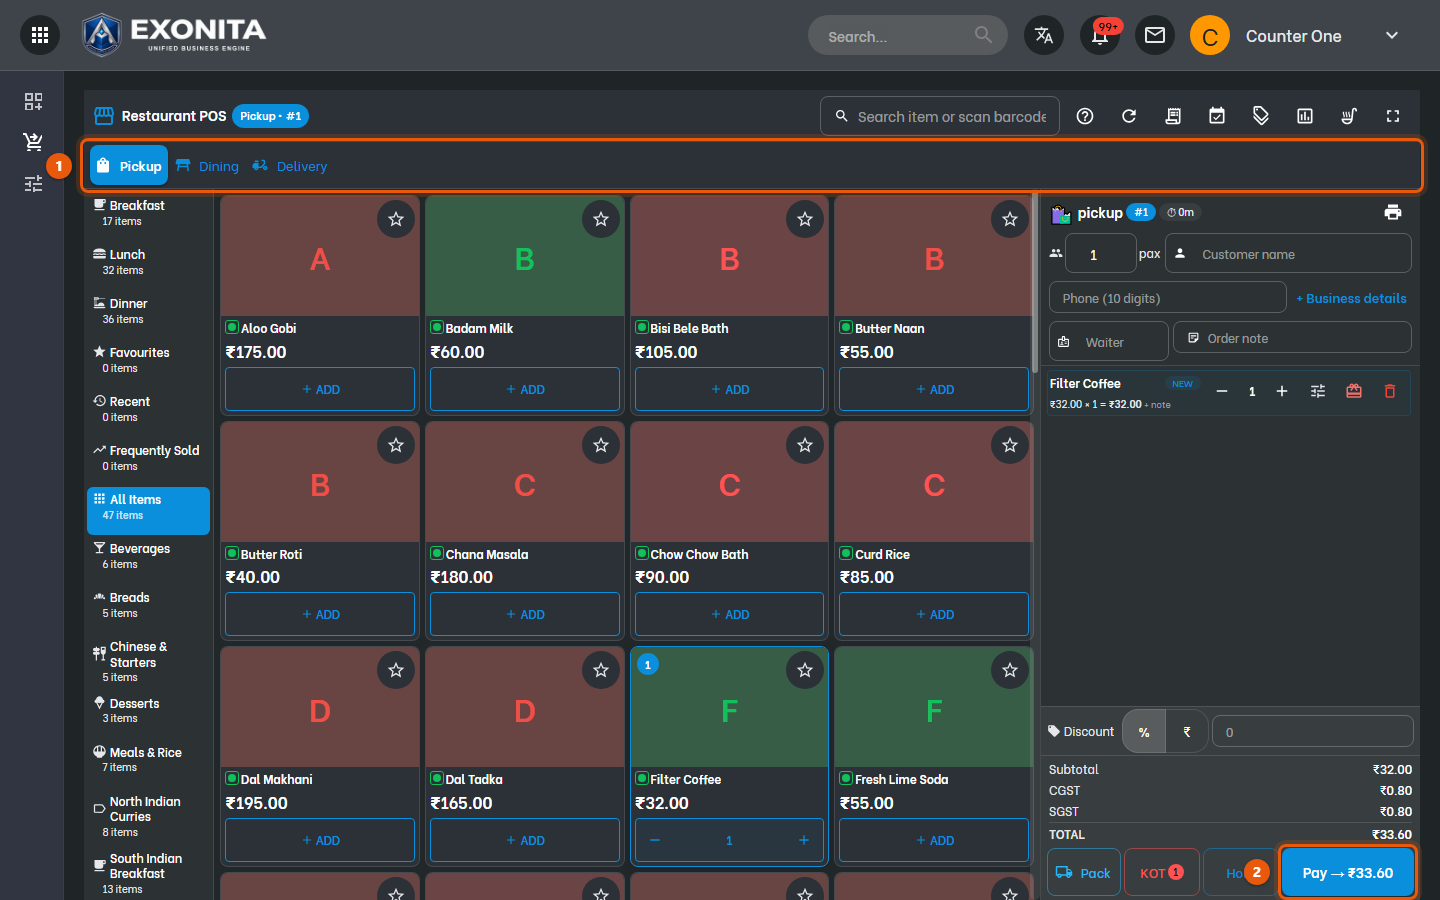
WhereRestaurant counter → Pickup
-
Select Pickup and add the dishes.
You'll see: The order gets a token number, shown next to pickup.
-
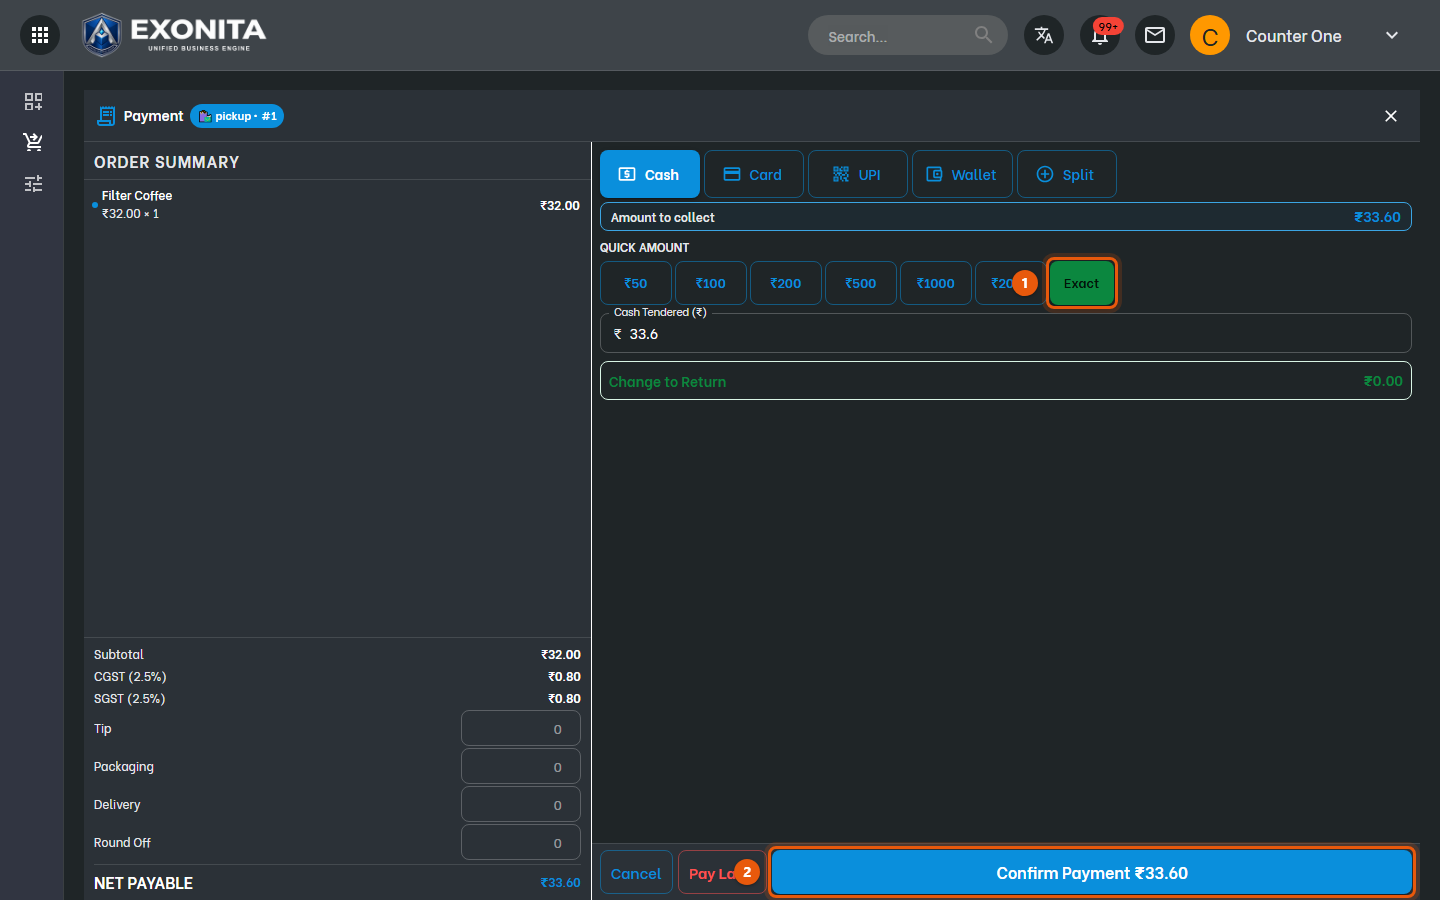
Select Pay, choose the payment mode, select Exact if the guest paid the exact amount, then Confirm Payment.
You'll see: The bill is posted and a new pickup order starts.
Task 7
Find, reprint or cancel a bill
Look up a bill you posted today.
WhereRestaurant counter → Recent Invoices
-
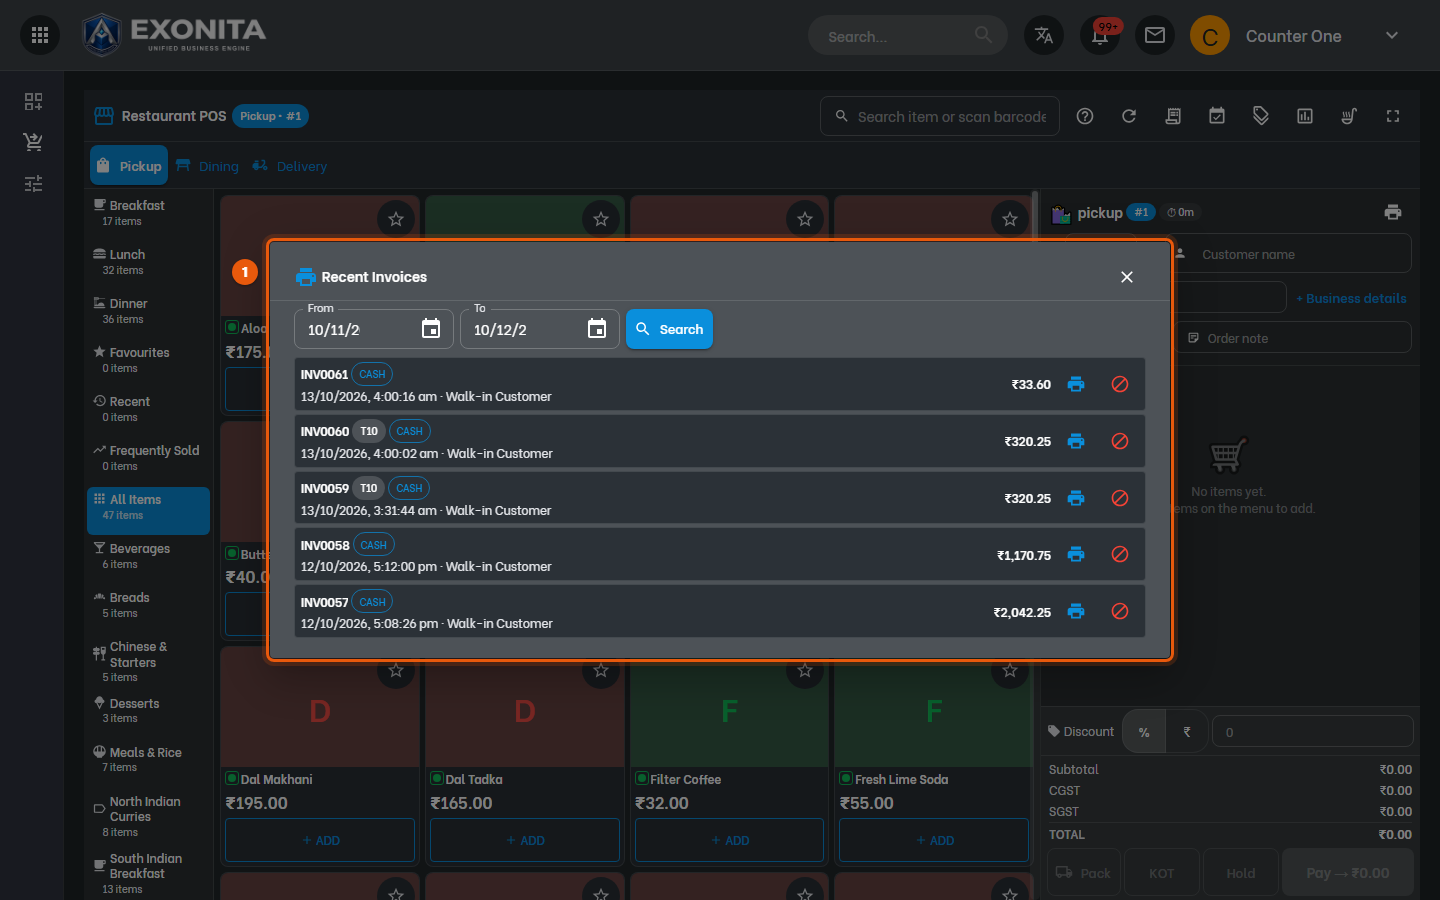
Select the Recent Invoices icon at the top of the counter, or press Alt+2. Choose the dates and select Search.
You'll see: Your bills are listed with the invoice number, table, payment mode, time and amount.
-
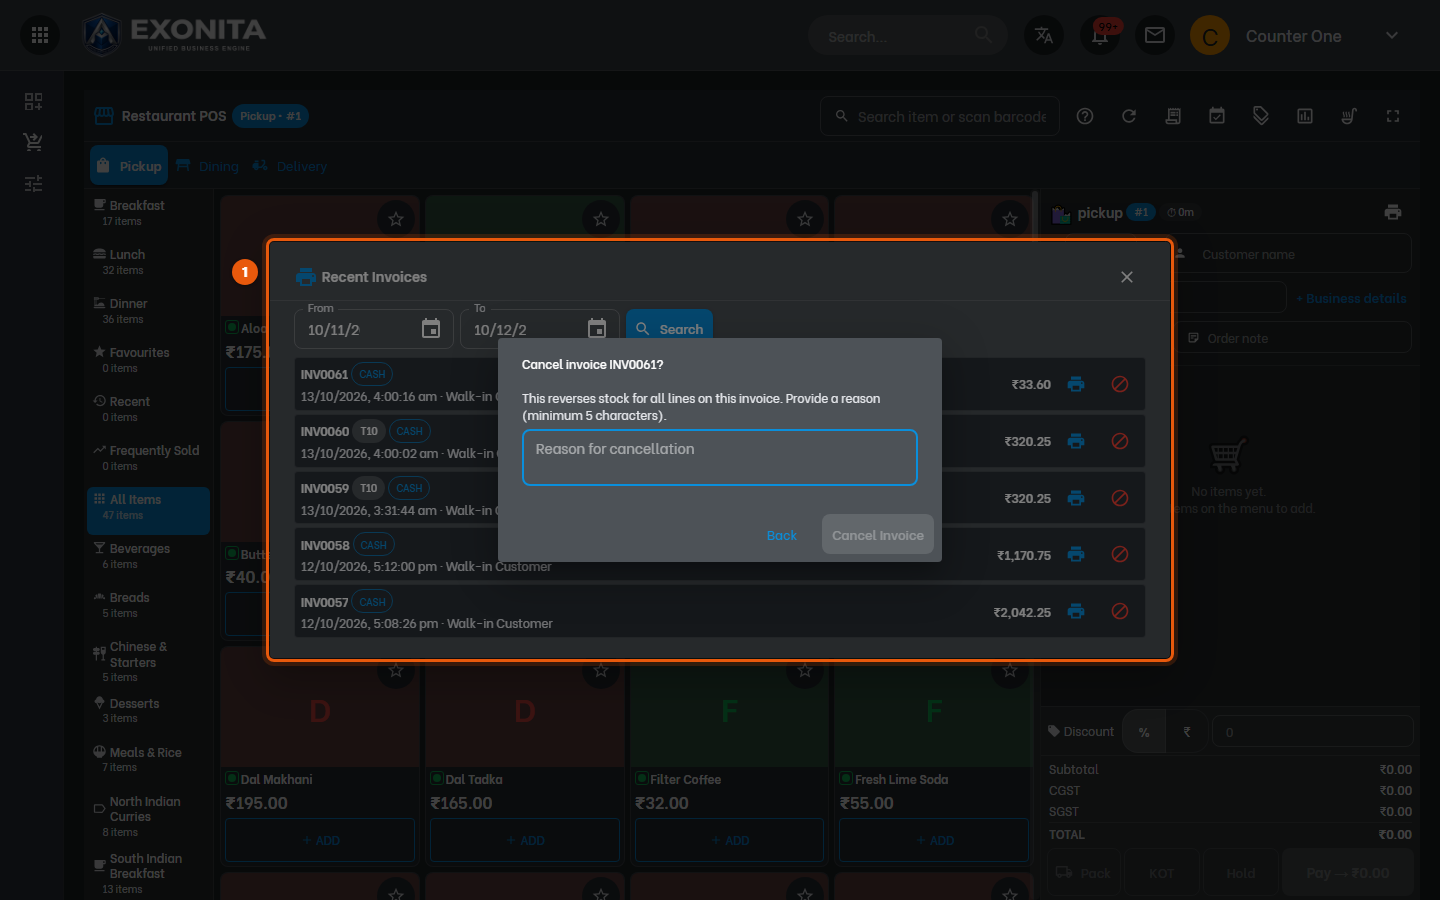
To reprint a bill, select its printer icon. To cancel a bill, select the red cancel icon next to it, enter the Reason for cancellation (at least 5 characters) and select Cancel Invoice. Select Back to keep the bill.
You'll see: A cancelled bill reverses the stock of its dishes and is counted under Cancelled in My Shift.
ImportantCancel only a bill that was posted by mistake. Every cancellation is recorded with your name and the reason.
Task 8
Check your shift
See your bills and the cash you should have in your drawer.
WhereMy Shift
-
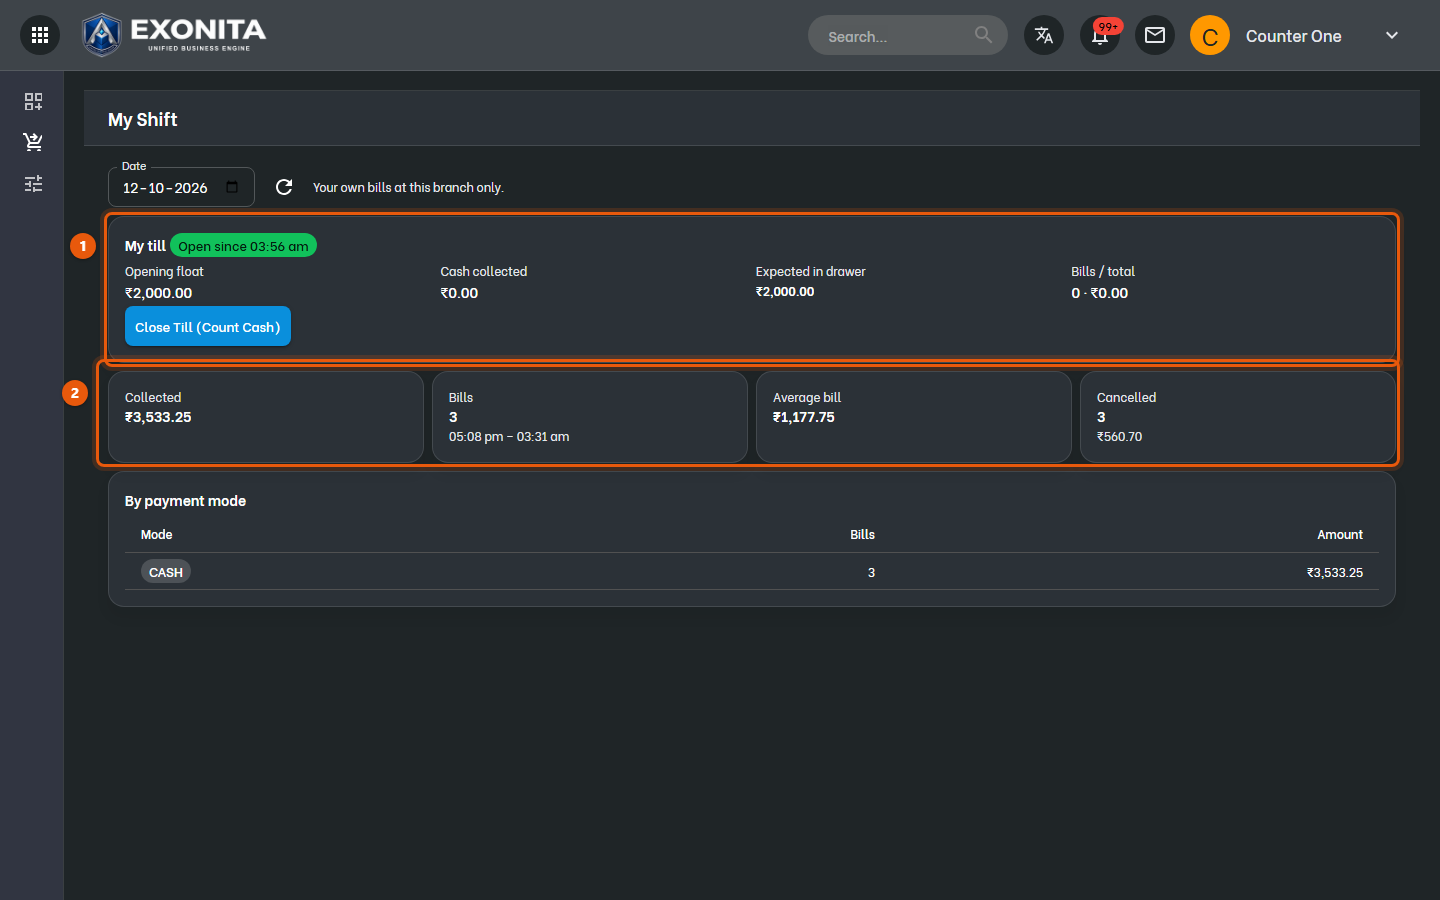
Open My Shift from the left menu.
You'll see: My till shows your opening float, cash collected and what should be in your drawer. Below it are your sales and the split by payment mode.
TipMatch the Card and UPI totals with your card machine and UPI app before you close your till.
Task 9
Close your till
End your shift by counting the cash in your drawer.
WhereMy Shift
-
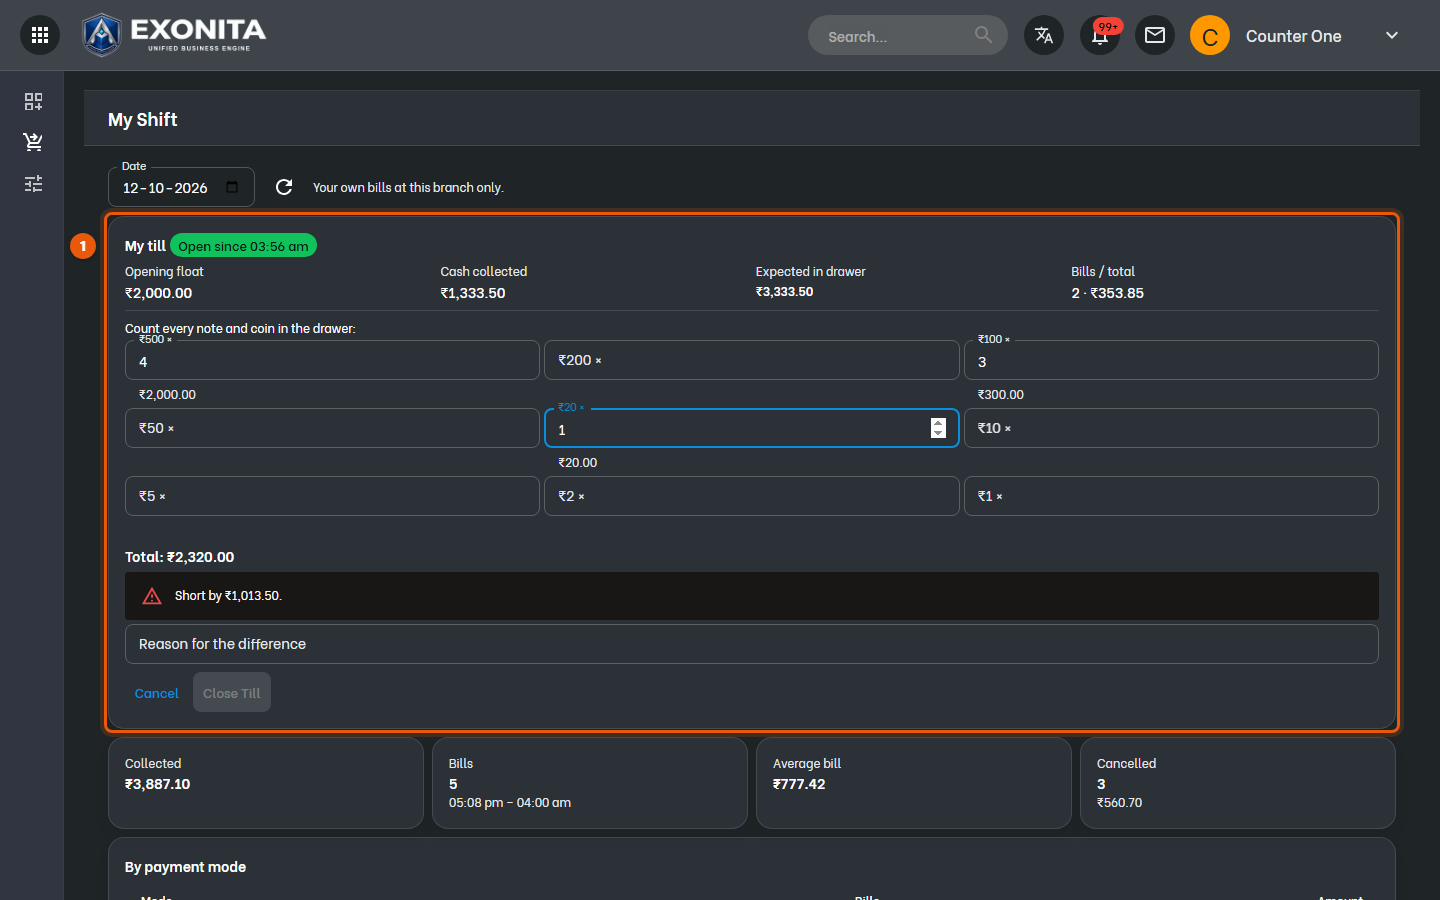
Select Close Till (Count Cash) and enter how many of each note and coin are in your drawer.
You'll see: If the count doesn't match, you see how much you are short or over.
-
If there is a difference, enter the Reason for the difference. Then select Close Till.
You'll see: Your till is closed. Hand the cash to your administrator.
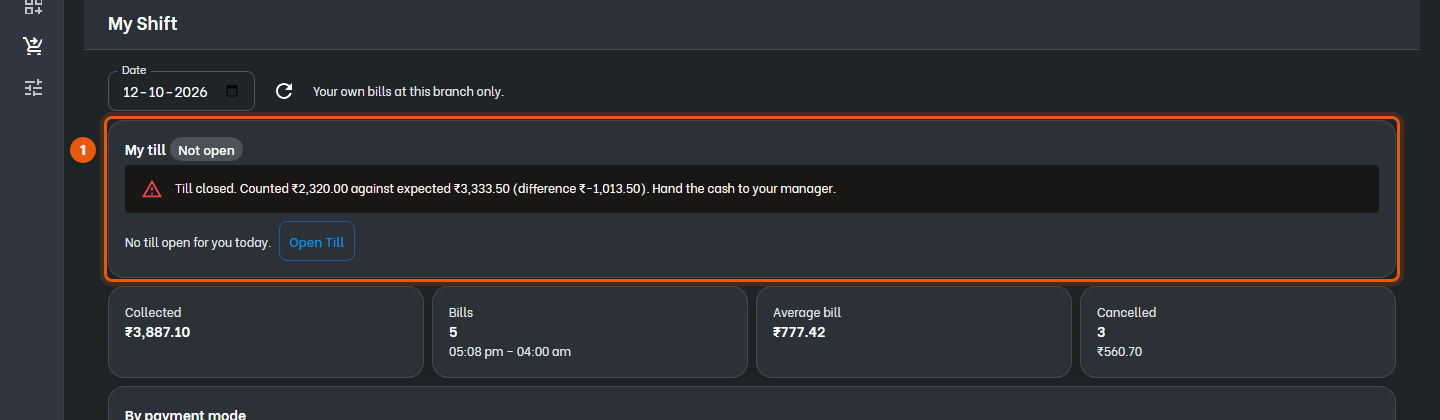
ImportantAfter you close your till you can't bill until you open a new one.