Exonita POS · Restaurant · Tenant Admin guide
Tenant Admin
Set up your restaurant once (business details, counters, invoice numbers, menu, tables, kitchen and staff), then check every till and close the business day.
What you can do
- Everything a cashier and a captain can do
- Set up business details, counters, invoice numbering, the menu, tables, waiters and the kitchen
- Add staff and choose what each role can do
- Change prices and give discounts at the counter
- Check every till, receive cash and close the business day
- See dashboards and reports and export them
Ask your administrator
- Your licence decides how many billing counters you can register. To add more, contact Exonita support.
Your administrator can change what your login can see. If a button in this guide is missing for you, ask them.
Your day at a glance
Task 1
Open Exonita POS
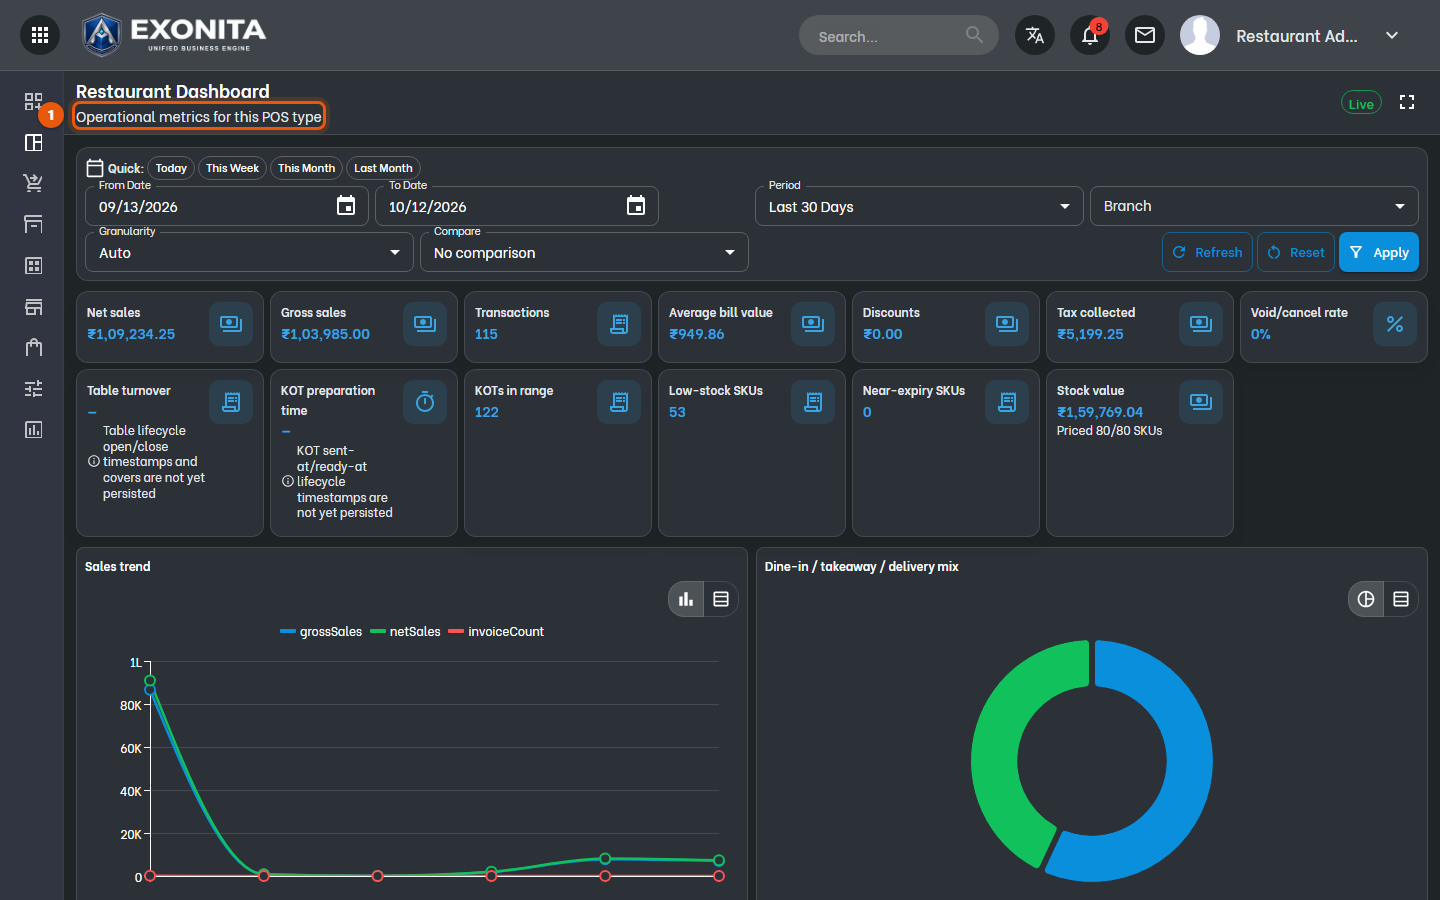
Start from the Restaurant Dashboard and find each screen in the left menu.
WhereApp launcher → Billing App
-
Sign in and open Billing App from the app launcher (Exonita POS shows as Billing App there). It opens on the Restaurant Dashboard. The icons on the left open every other screen.
You'll see: You see today's sales, bills and kitchen load for your branch.
TipNew tenants also get a Getting started checklist (bottom-left) that lists these setup tasks in order. This guide follows the same order.
Task 2
Set your branch to Restaurant
Choose what each branch sells, so the right counter opens.
WhereSettings → Branch POS types
-
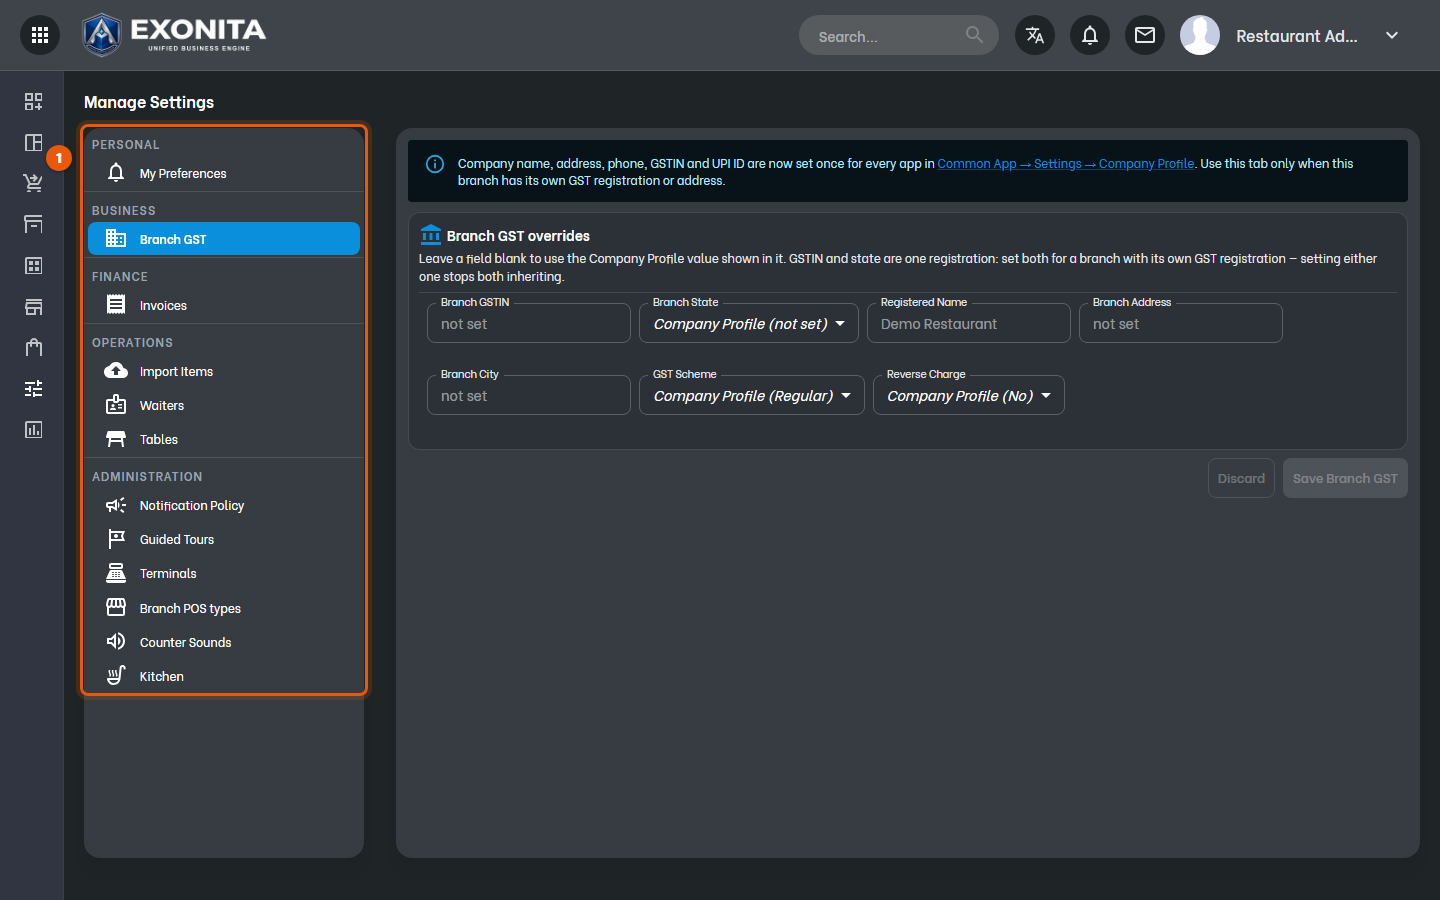
Open Settings. The setting groups are listed on the left.
You'll see: Settings opens on Branch GST. Enter your Branch GSTIN and address, then select Save Branch GST.
-
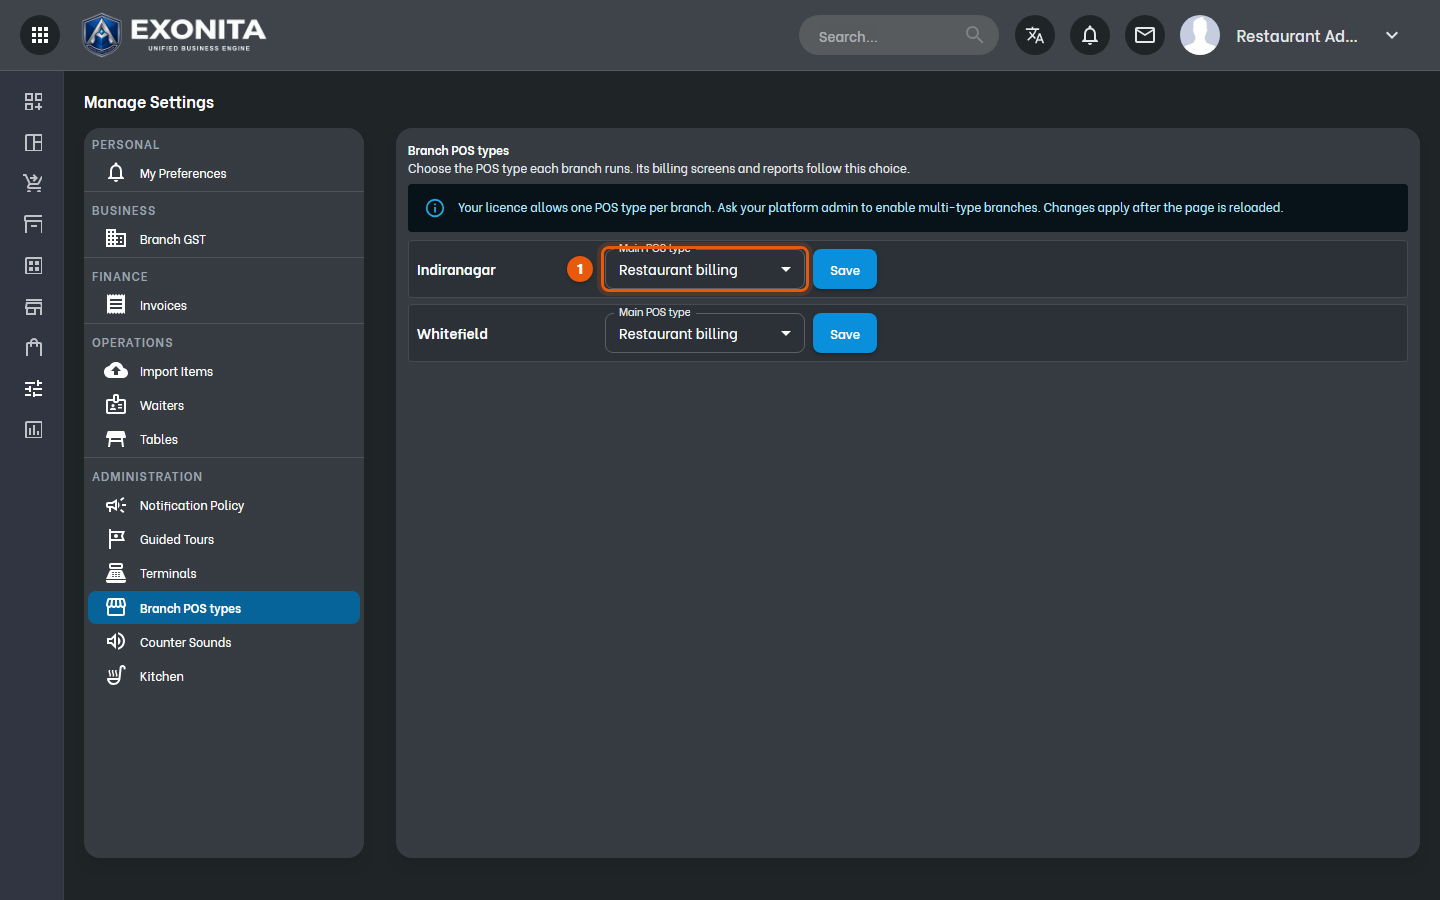
Select Branch POS types. For each branch, choose Restaurant billing as the Main POS type and select Save.
You'll see: Cashiers at this branch get the restaurant counter.
Task 3
Register a billing counter
Allow a computer to bill. Each counter is one terminal on your licence.
WhereSettings → Terminals
-
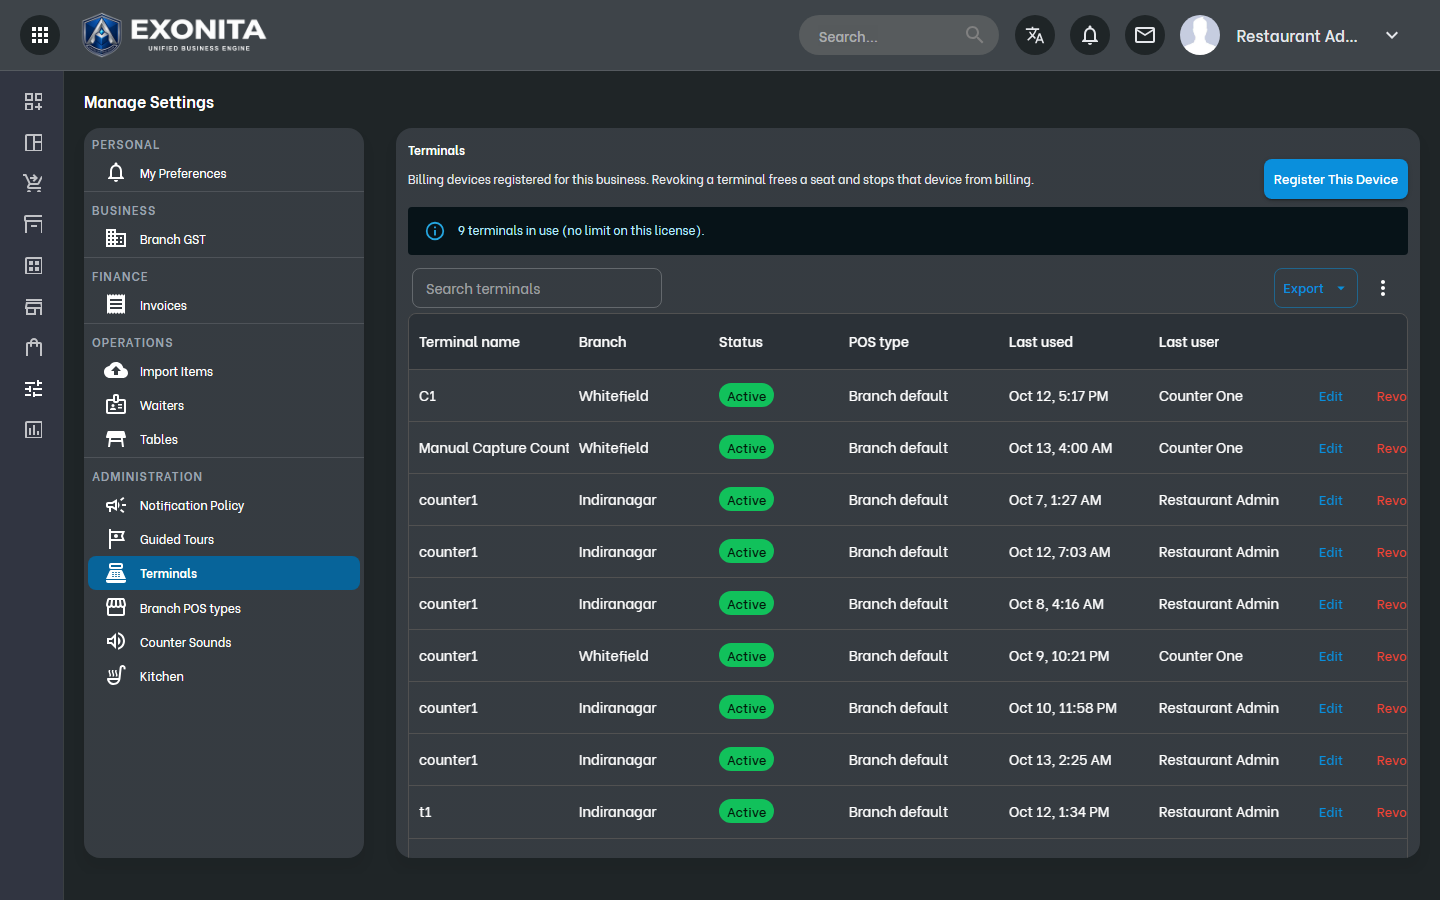
Select Terminals.
You'll see: You see every registered counter, its branch, its last user and how many of your licence's terminals are in use.
-
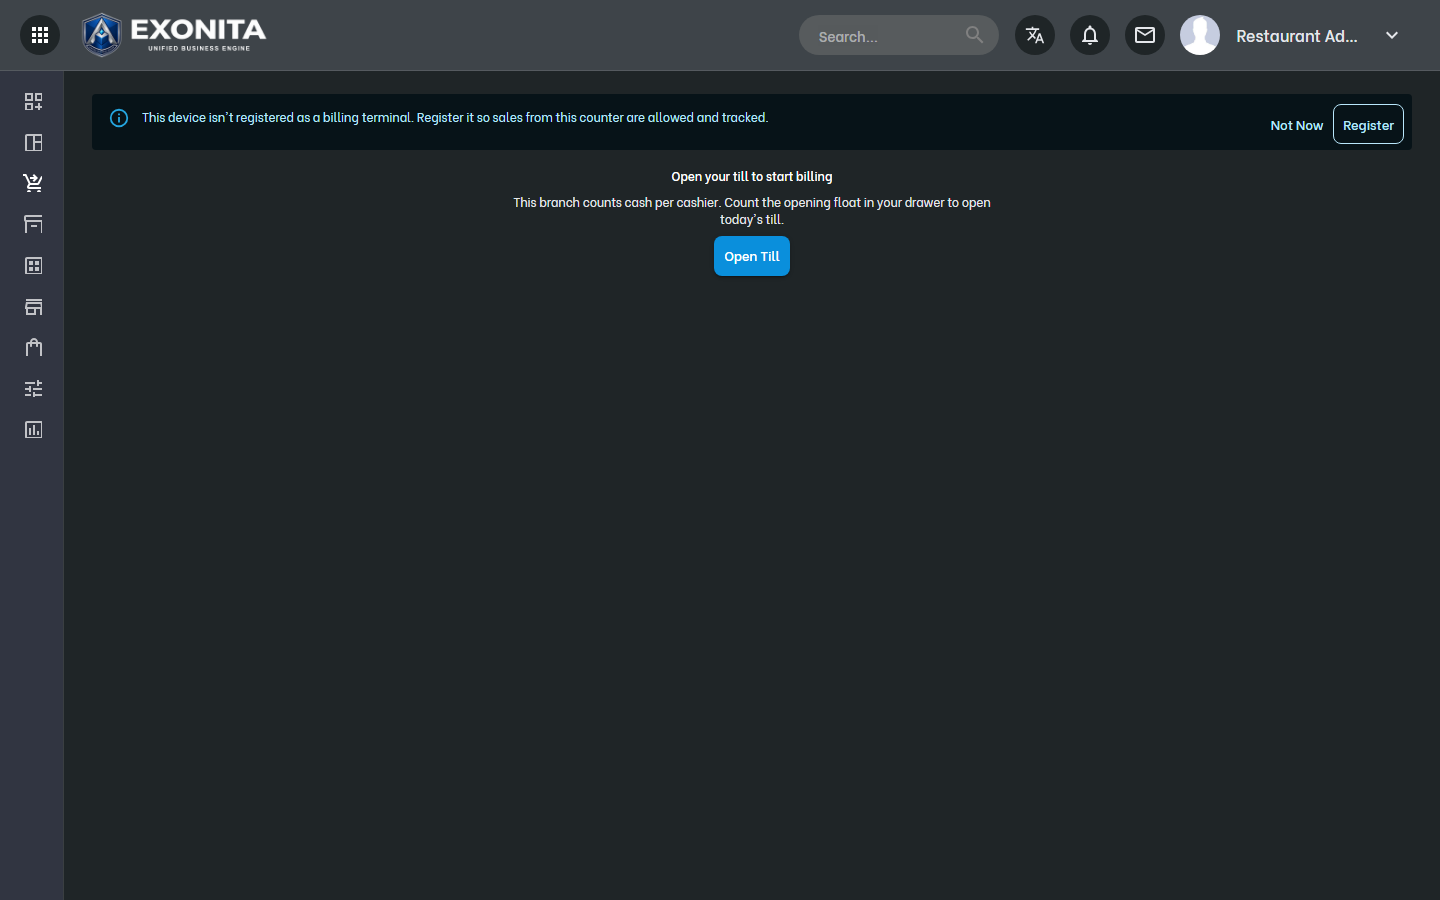
On the computer at the counter, open the restaurant counter. Select Register this device, give it a name such as
Counter 1, and select Register.You'll see: The computer is now a billing counter for your current branch.
TipTo stop a lost or old computer from billing, select Revoke next to it in Terminals. That frees a seat on your licence.
Task 4
Set invoice numbering
Choose the number series printed on every bill.
WhereSerial Numbers
-
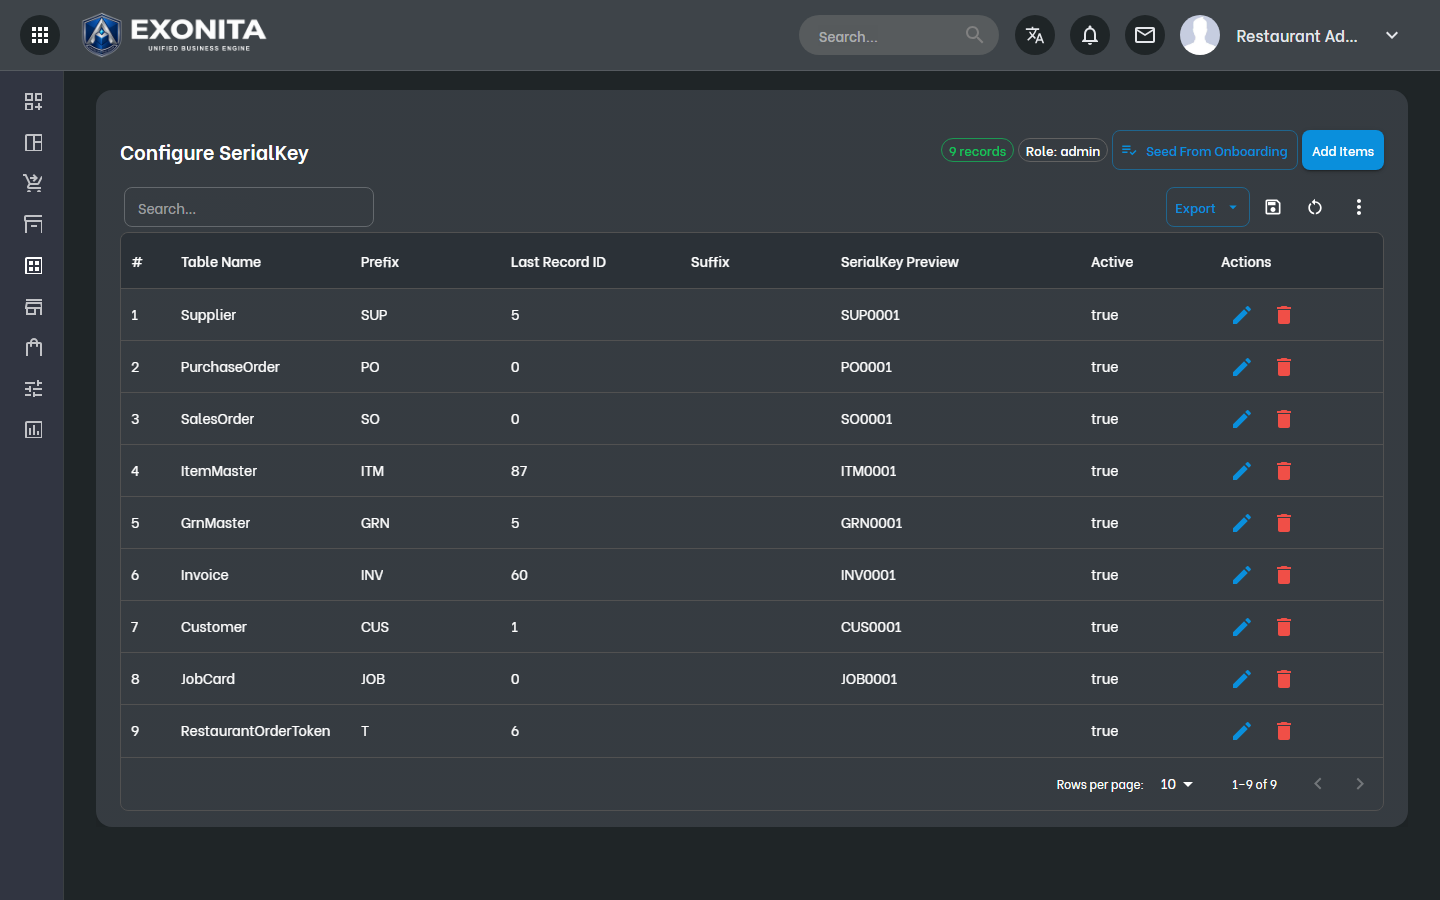
Open Serial Numbers and set the prefix and starting number for your bills.
You'll see: New bills use this series.
ImportantSet this before your first bill. Changing it later can leave gaps in your invoice numbers.
Task 5
Add categories, units and tax
Create the lists your menu items use.
WhereMaster Data
-
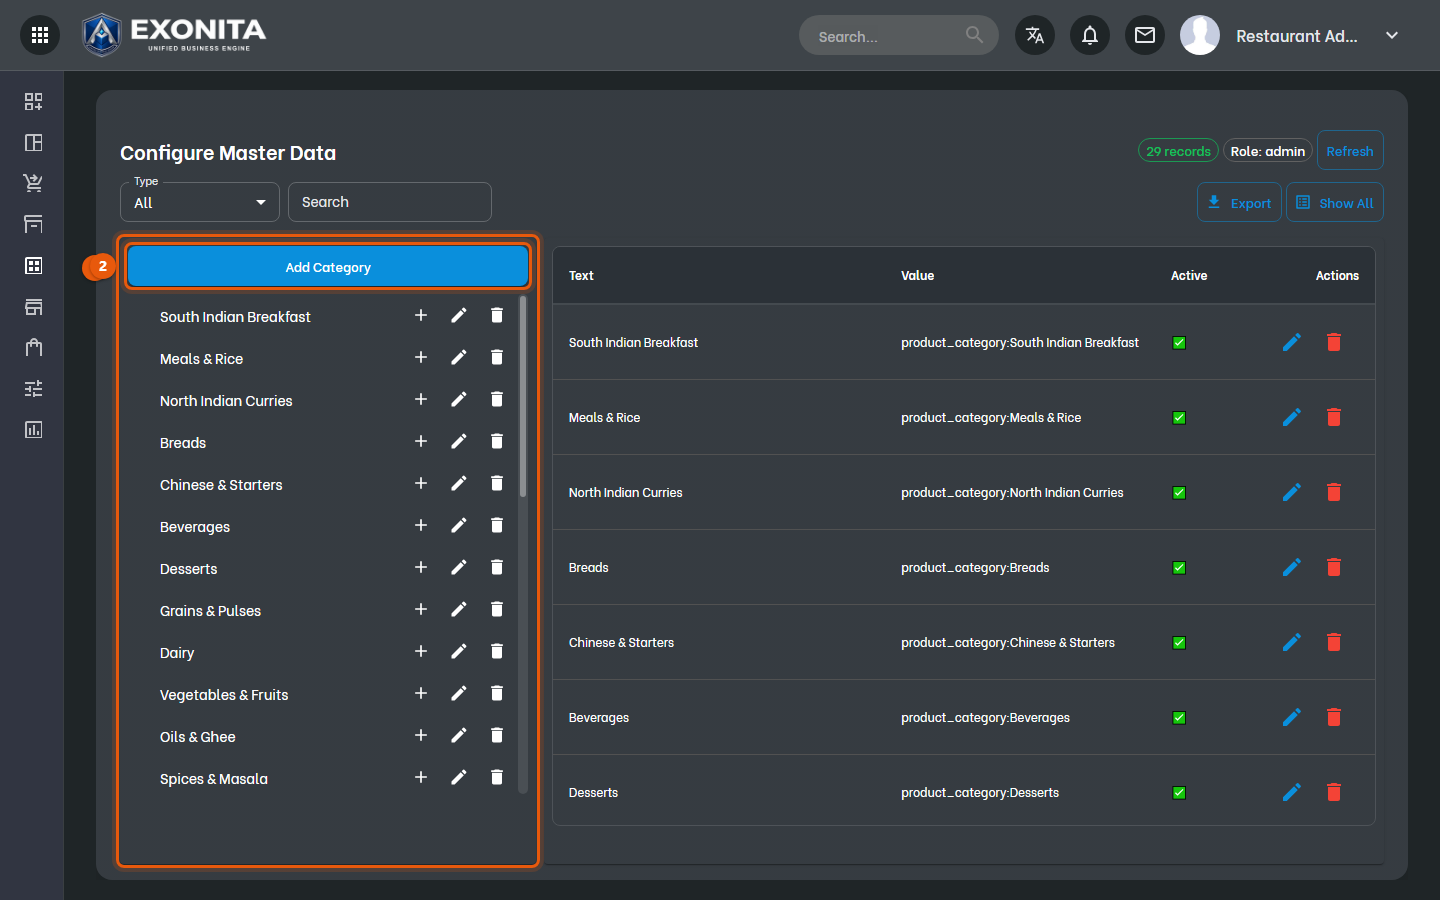
Open Master Data. Choose a list on the left, such as categories or tax, and select Add Category (or Add Child for a sub-category).
You'll see: The new entry can be used on your items.
TipCreate kitchen-friendly categories, such as Starters, Mains, Breads and Beverages. Kitchen stations are set up per category.
Task 6
Add your menu items
Put every dish on the menu with its price and tax.
WhereItem Master
-
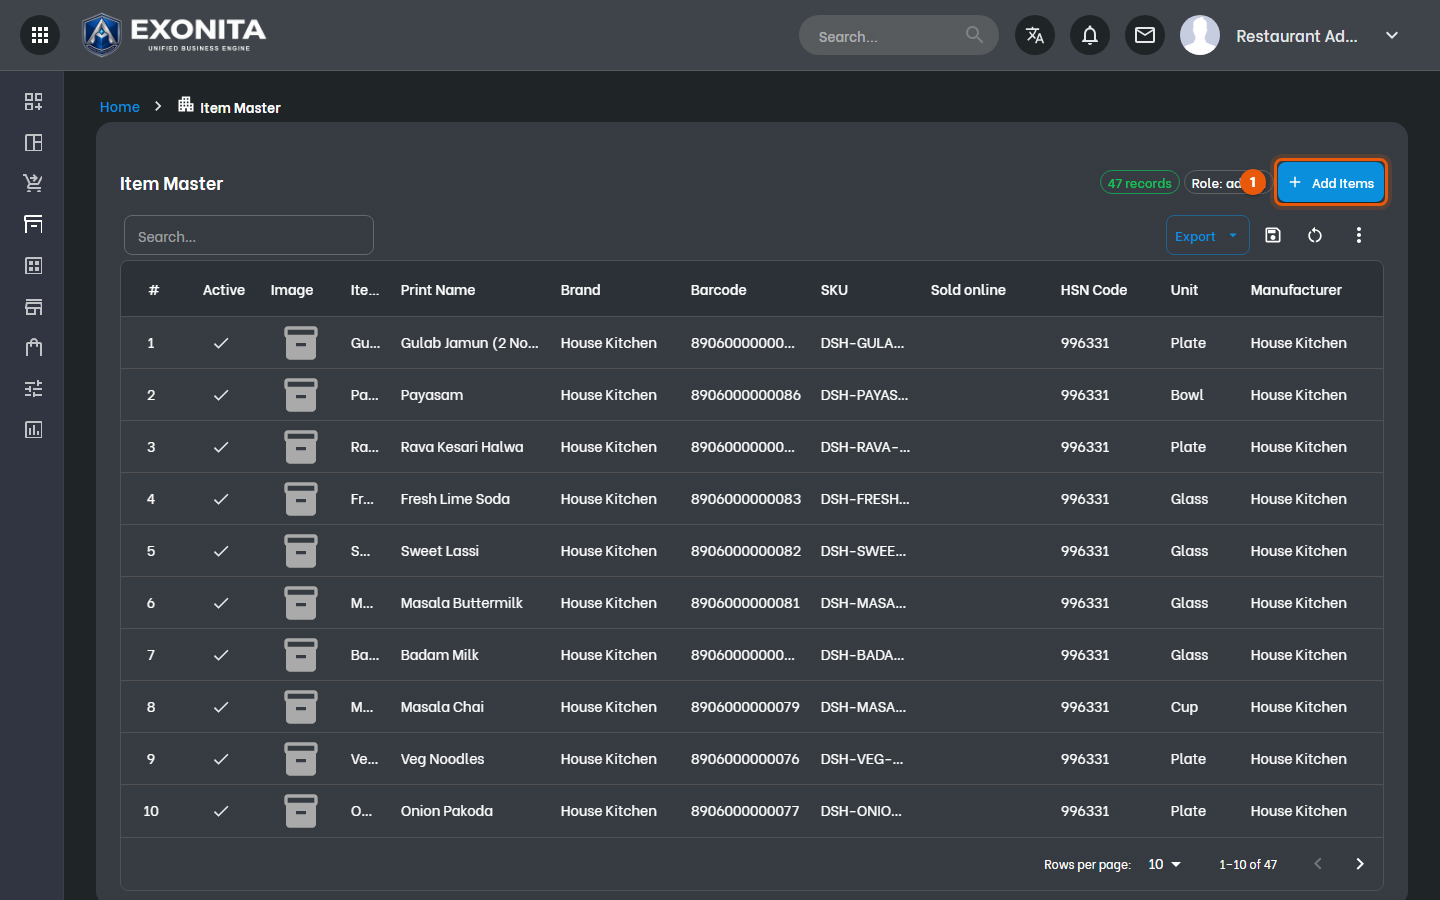
Open Item Master. Your dishes are listed with their category and price.
You'll see: Select Add for one dish, or Import to load a spreadsheet of many.
-
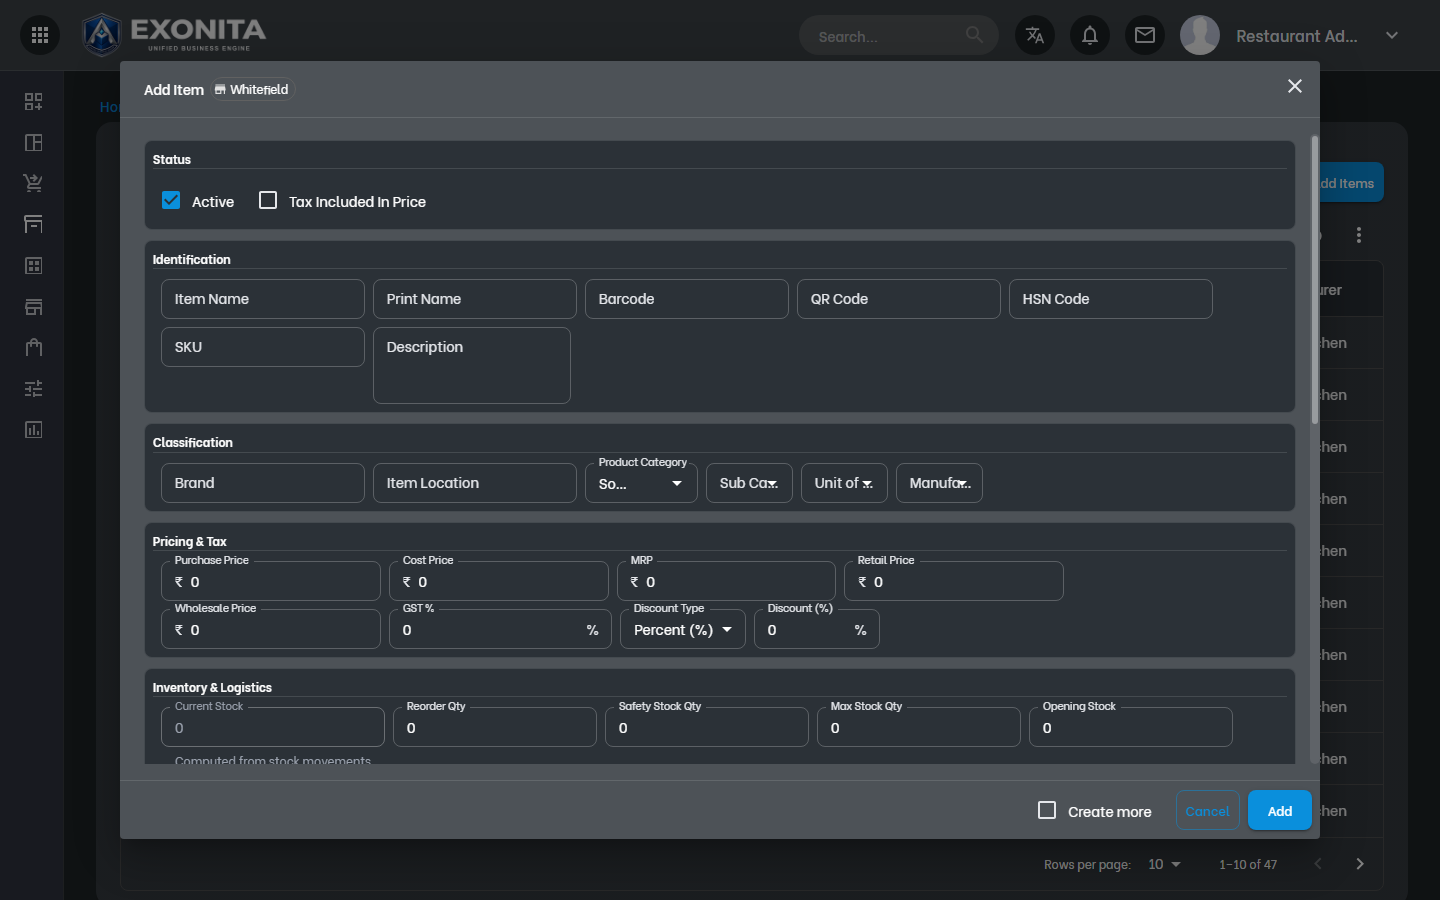
Select Add. Enter the dish name, category, price and tax, then select Save.
You'll see: The dish appears on the counter and the Captain screen.
Task 7
Check the invoice layout
Make sure the printed bill looks right.
WhereSettings → Invoices
-
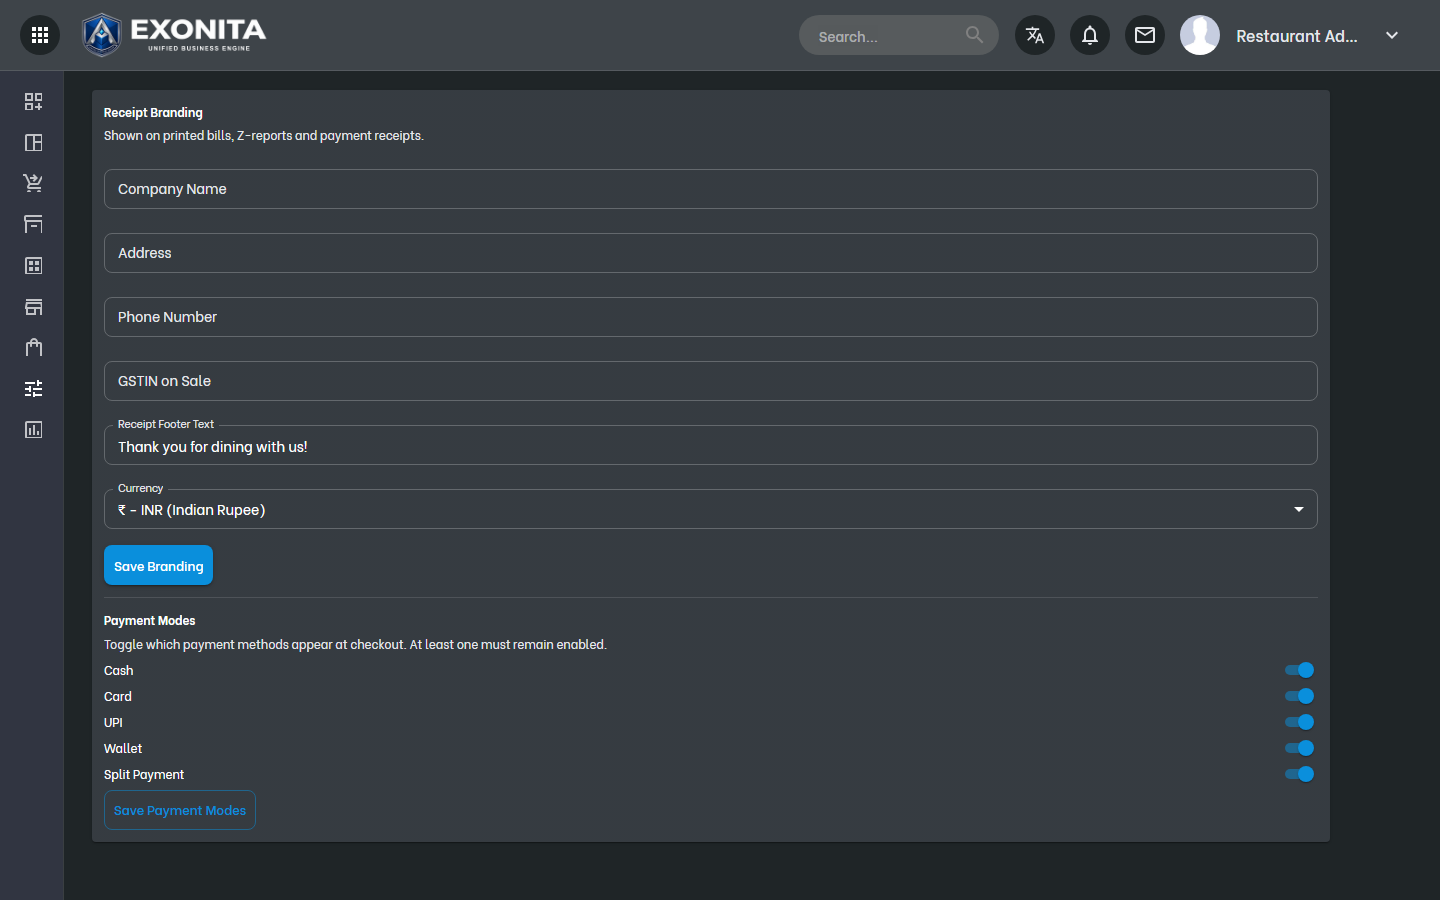
Open Invoices and check the preview of your bill: business name, GST number, address and footer.
You'll see: Bills print with this layout.
Task 8
Add tables and waiters
Set up your floor so orders can be taken per table.
WhereSettings → Tables / Waiters
-
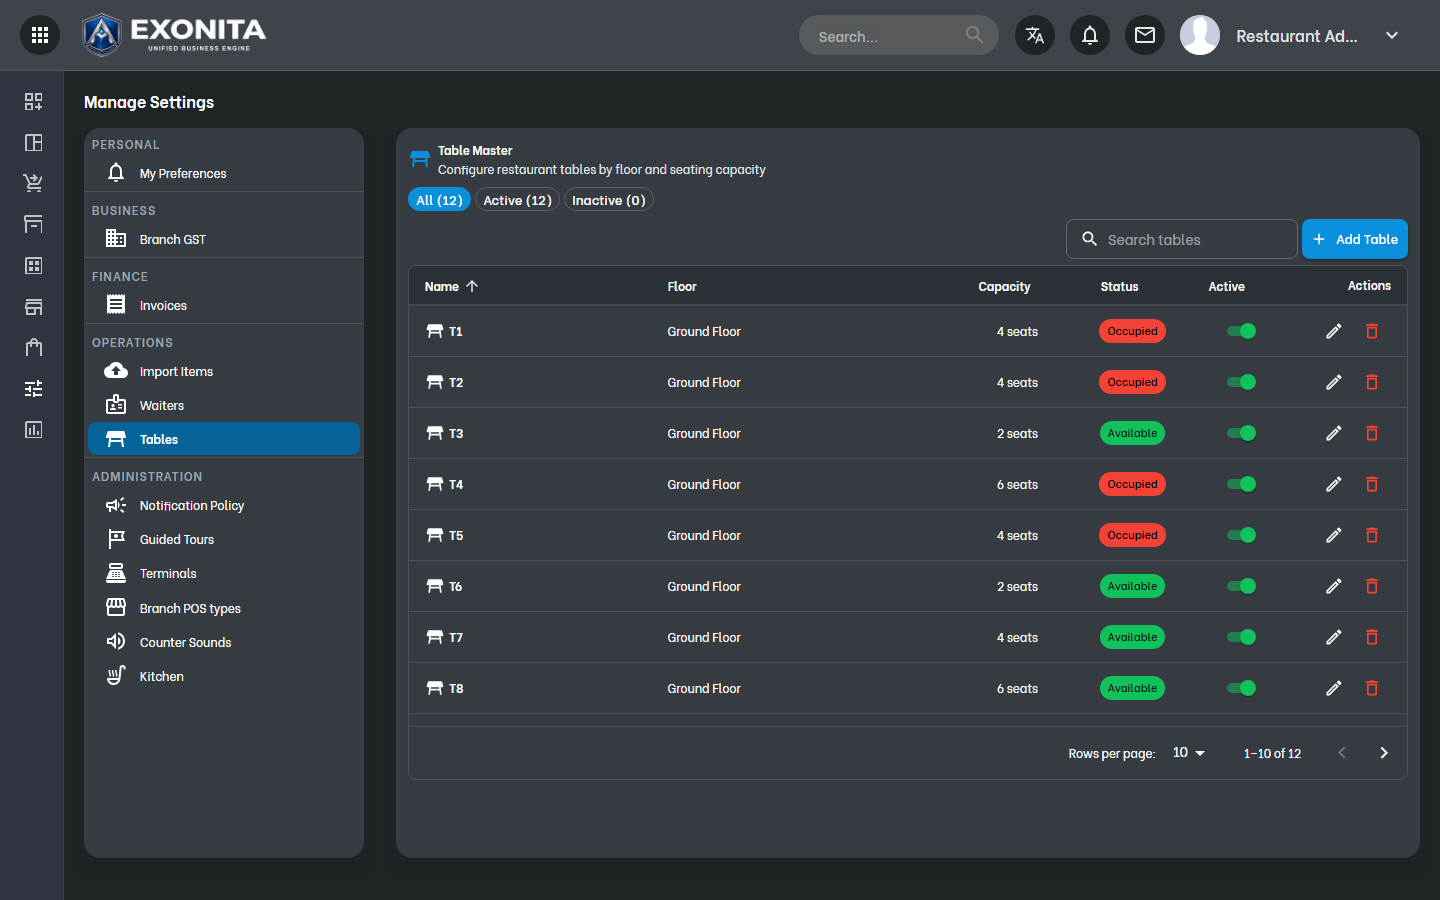
Select Tables and add each table with its name, for example
T1, and its seats.You'll see: The tables appear on the counter's table map and the Captain screen.
-
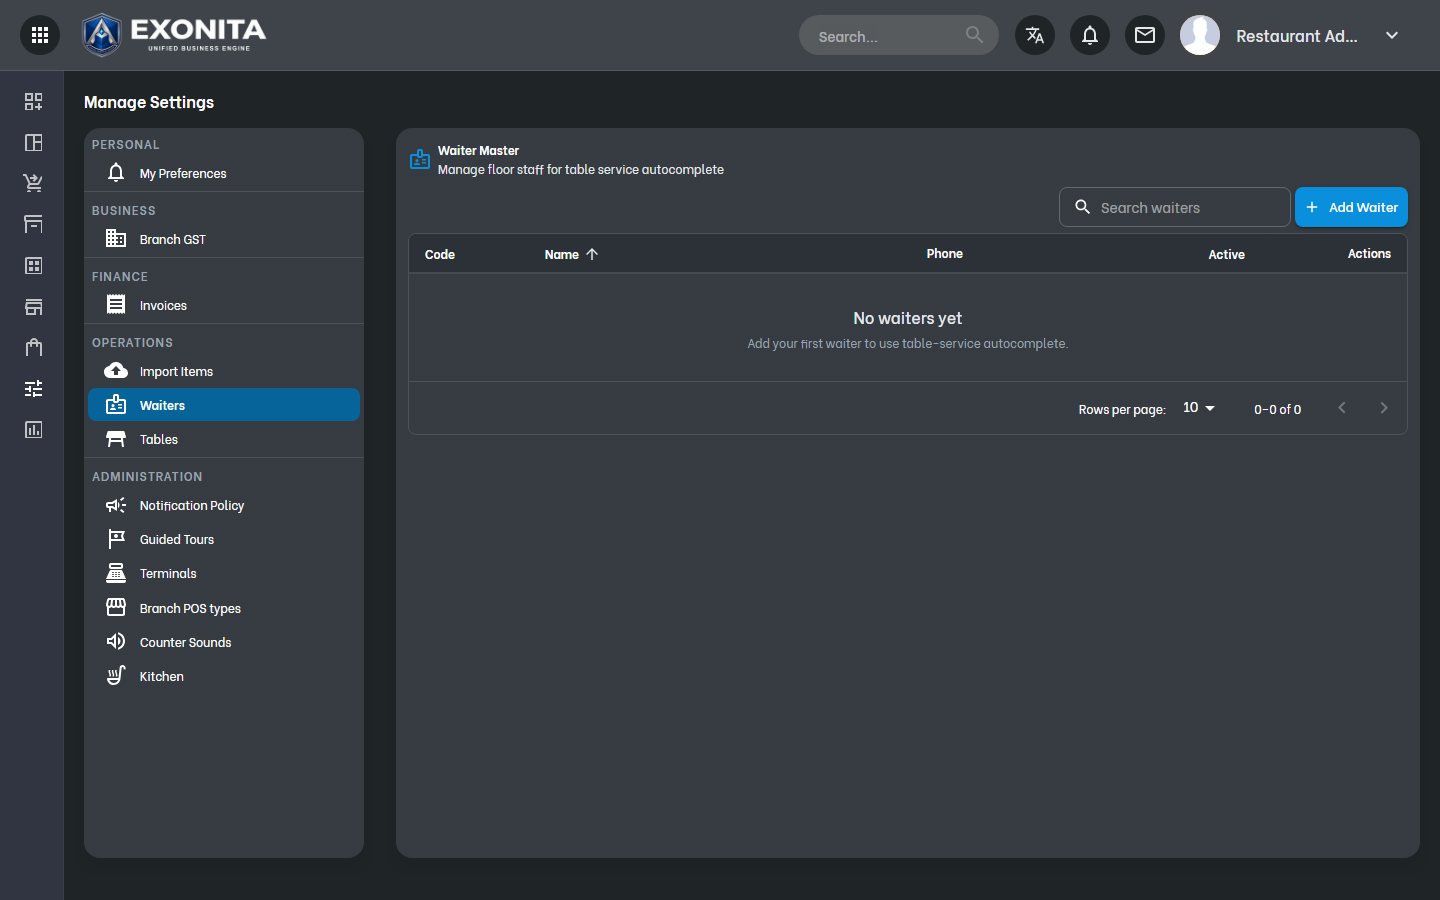
Select Waiters and add each waiter.
You'll see: Cashiers can choose the waiter on an order, and reports show sales per waiter.
Task 9
Set up the kitchen
Send each dish's ticket to the right station and printer.
WhereSettings → Kitchen
-
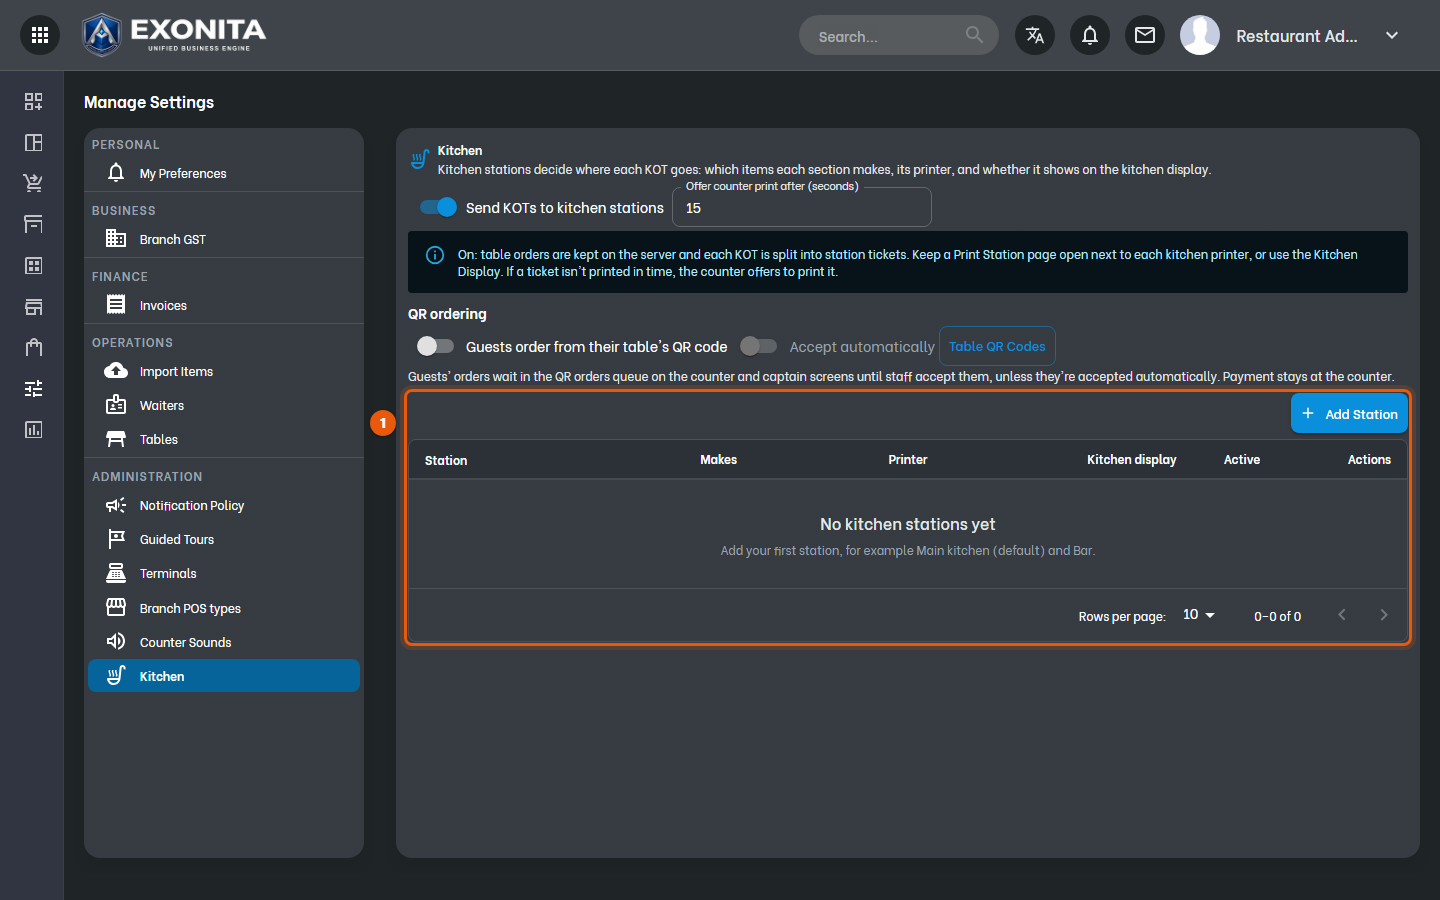
Select Kitchen. Add a station for each part of your kitchen, such as Main kitchen, Bar or Tandoor, and pick the categories it makes. Make one station the default.
You'll see: KOTs from the counter and from captains go to the right station.
-
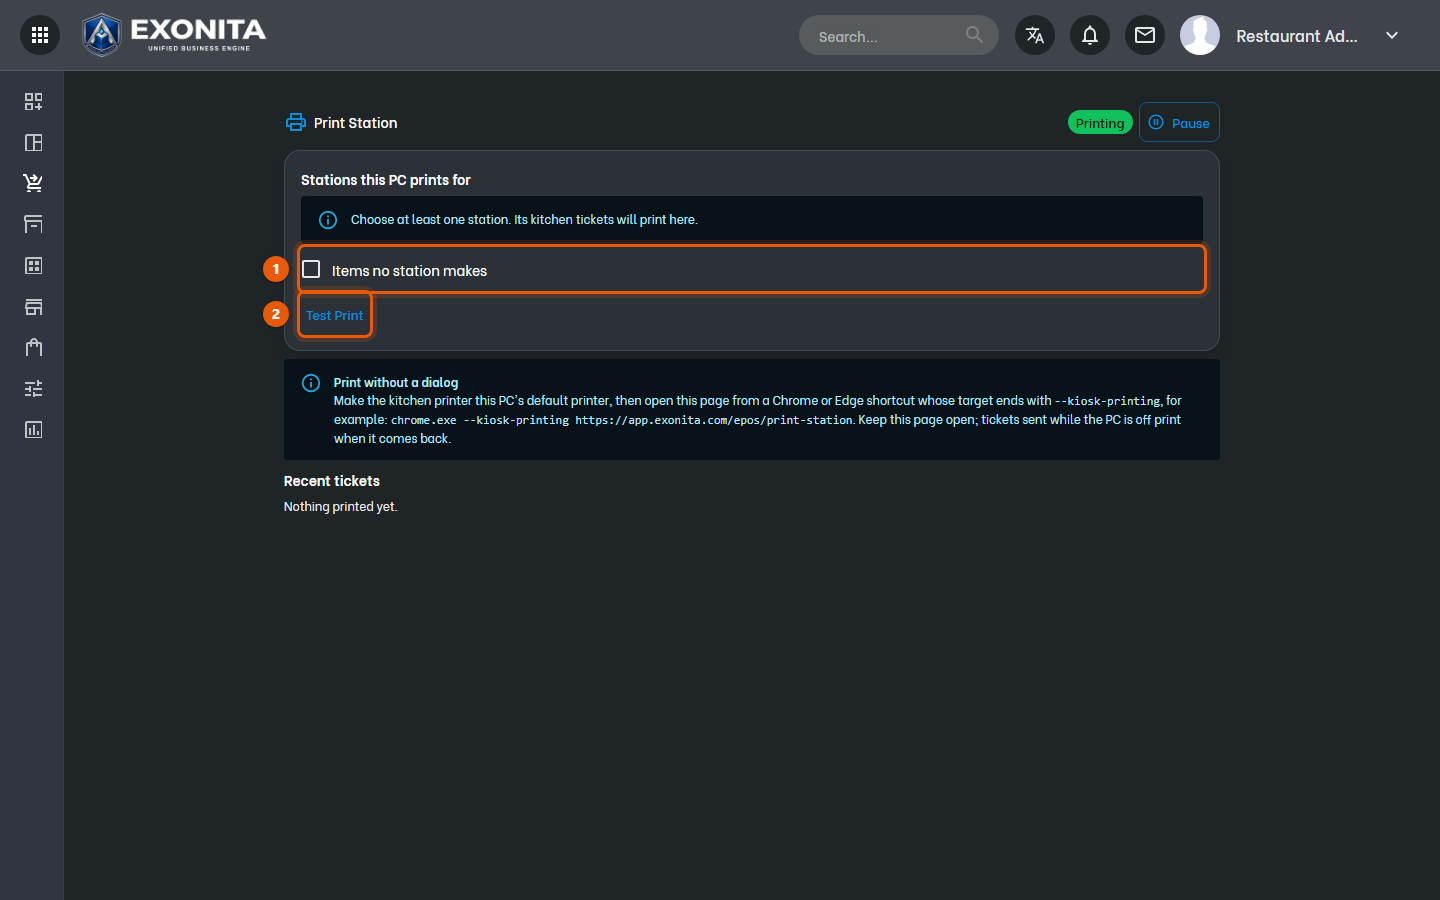
On the computer next to a kitchen printer, open Print station. Tick the stations this printer serves and print a test ticket.
You'll see: Kitchen tickets print here automatically while this page stays open.
-
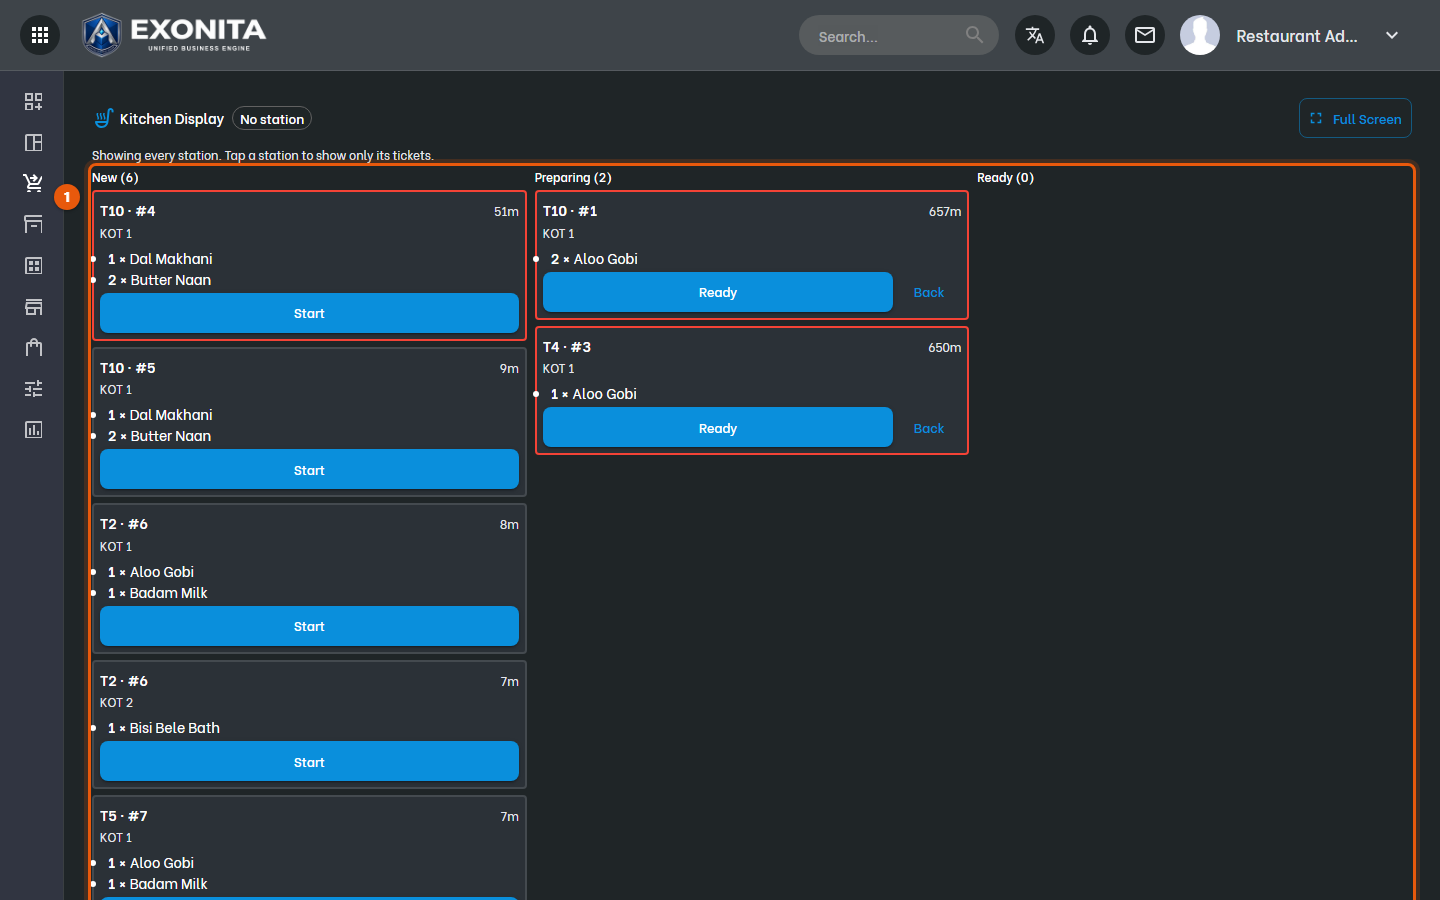
If your kitchen uses a screen instead of paper, open Kitchen display on it.
You'll see: New tickets appear with a chime. Kitchen staff tap Start, Ready and Served.
Task 10
Choose what each role can do
Decide which screens and actions cashiers and captains get.
WhereCommon App → Role Management
-
Open Role Management, choose a role such as Cashier or Captain, and switch permissions on or off.
You'll see: The change applies the next time those users open a screen.
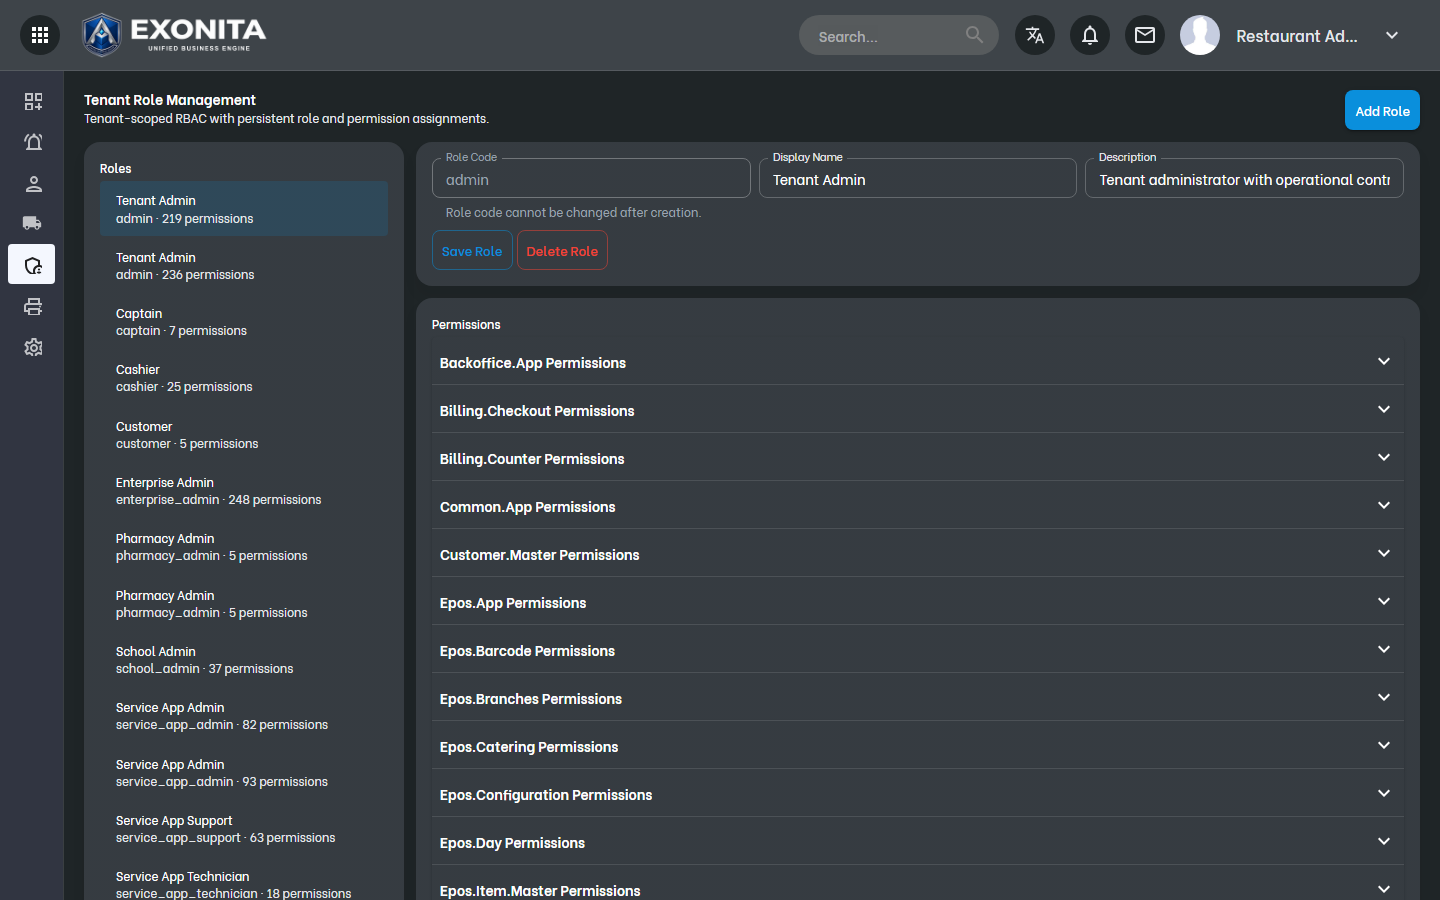
TipCashiers can't give discounts or change prices by default. Turn on those permissions only for people you trust with them.
Task 11
Close the business day
Check every till, receive the cash and close the day.
WhereDay Close
-
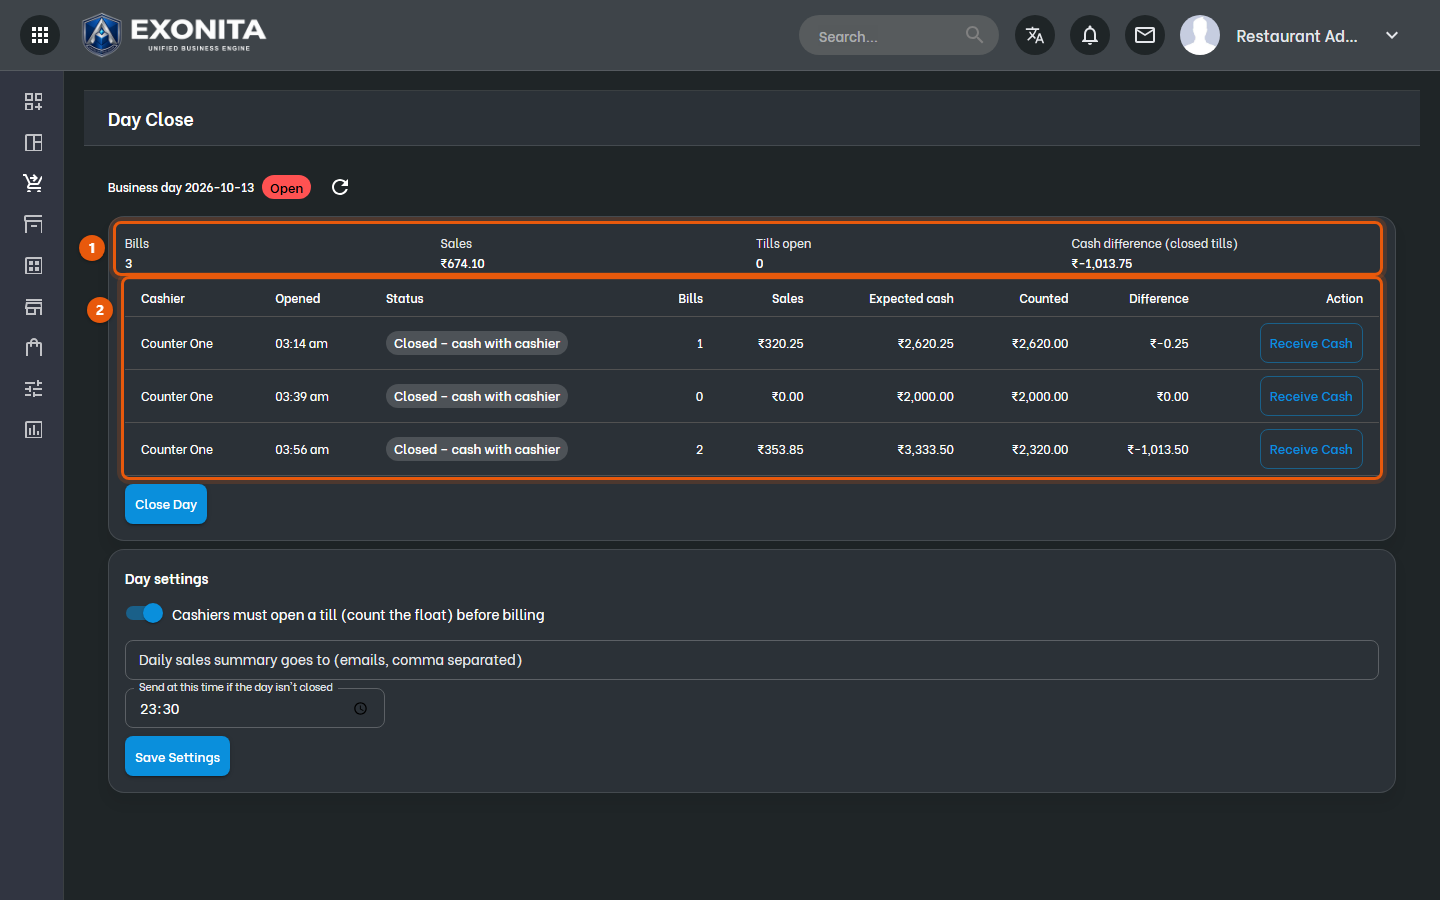
Open Day Close. Today's totals show sales and cash for the whole branch.
You'll see: Below, every till is listed with its cash difference.
-
Receive the cash from each closed till. Close the till for any cashier who has left. When every till is closed, select Close the day.
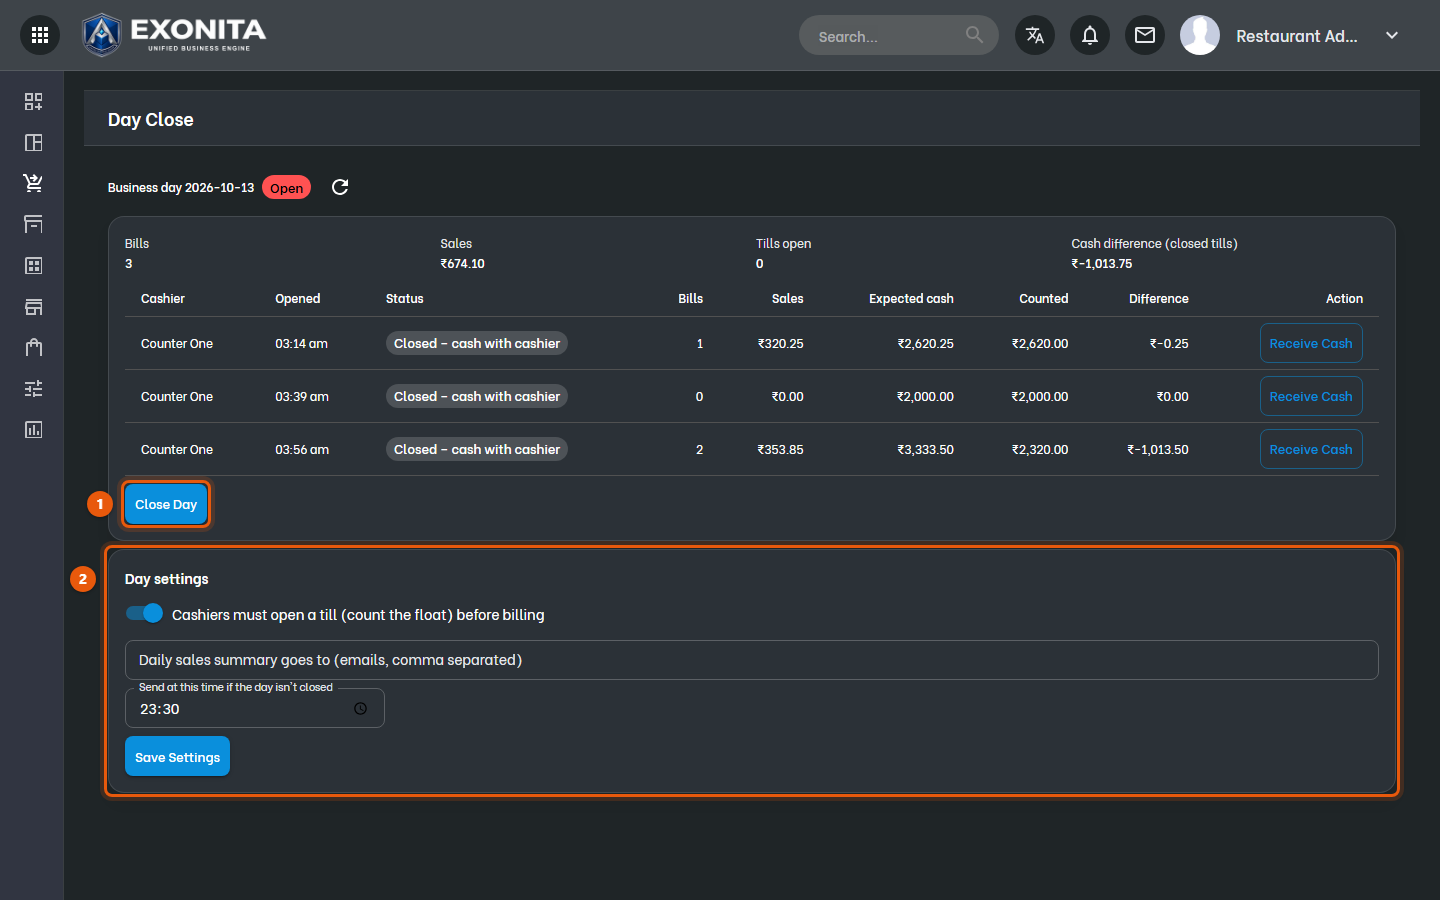
You'll see: The day is closed and the daily summary is emailed to the people in Day settings.
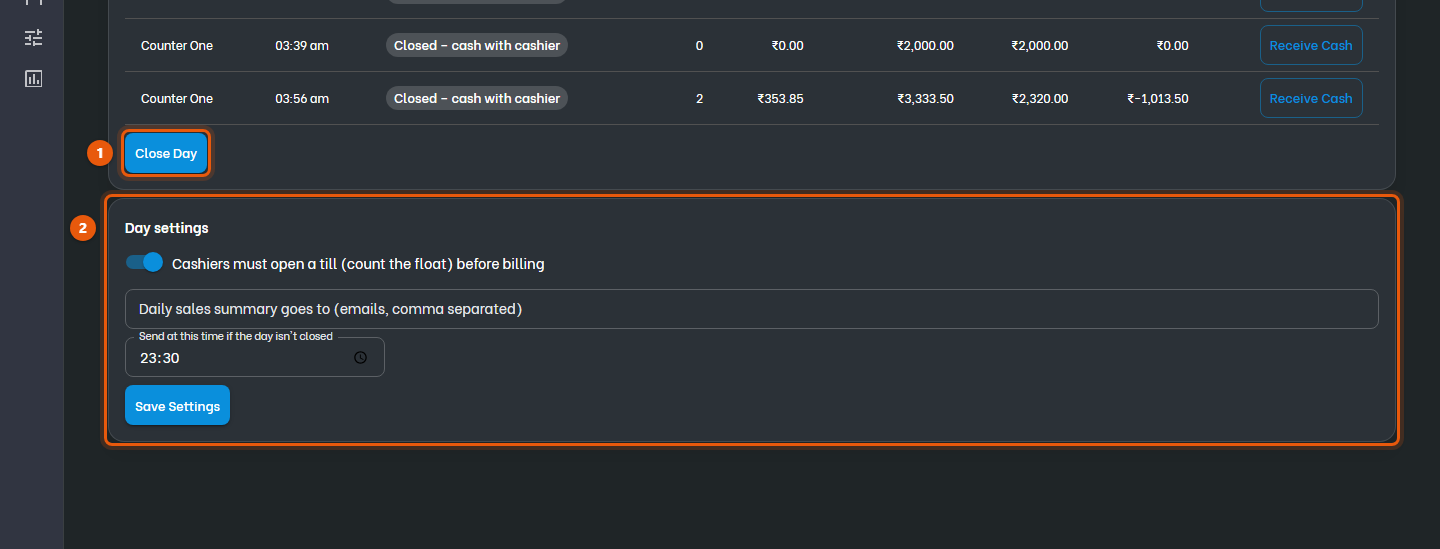
ImportantAfter the day is closed, no more bills can be posted for it. You can reopen it from this page if needed.
Task 12
Check sales and reports
See how the restaurant is doing.
WhereDashboard / Reports
-
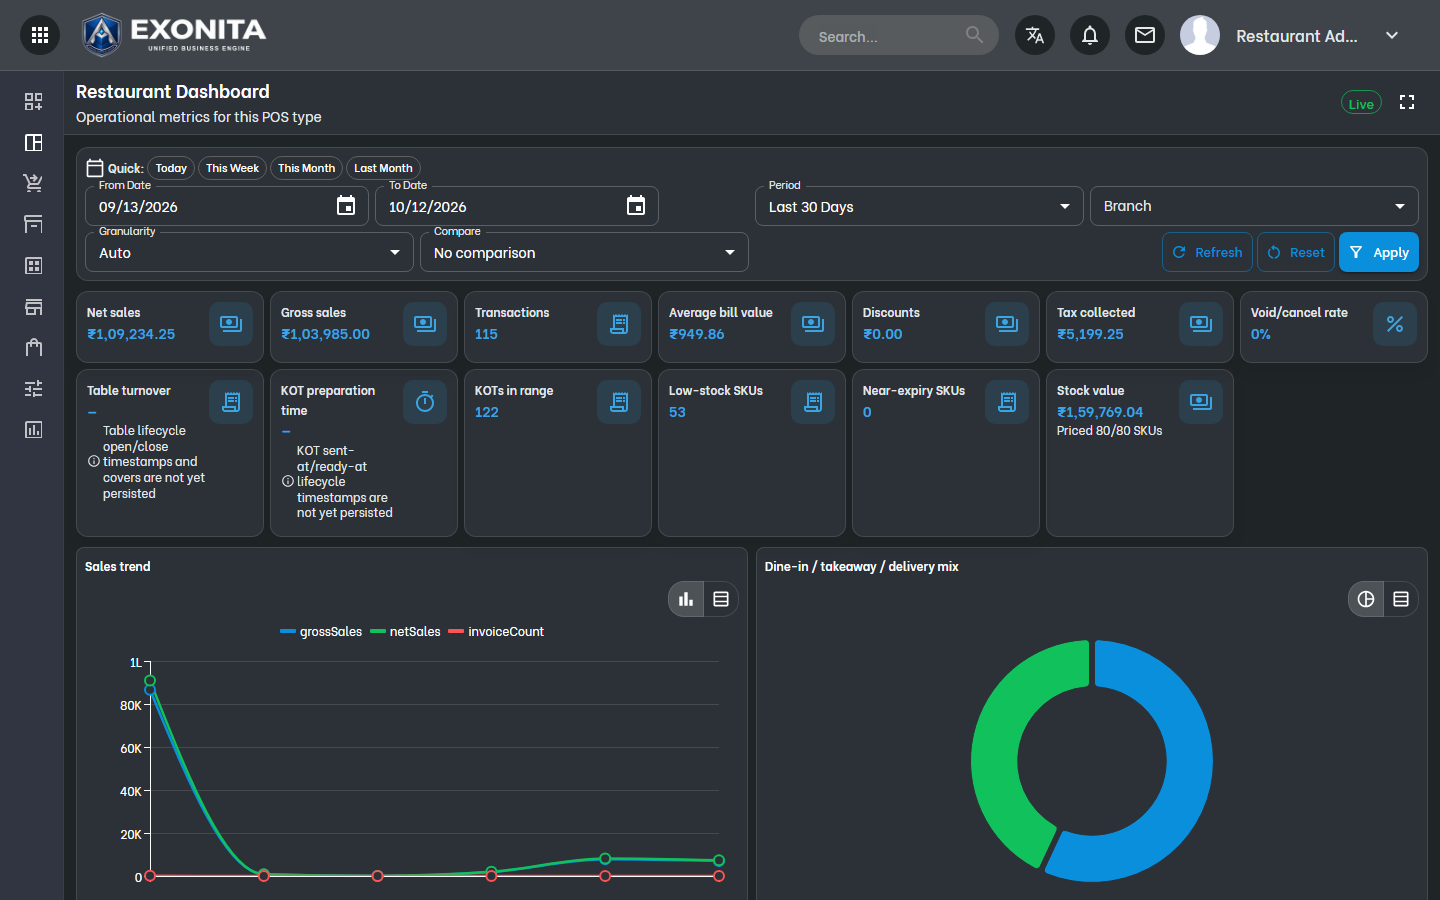
Open Dashboard → Restaurant Dashboard for today's sales, orders and top dishes.
You'll see: The dashboard updates as bills are posted.
-
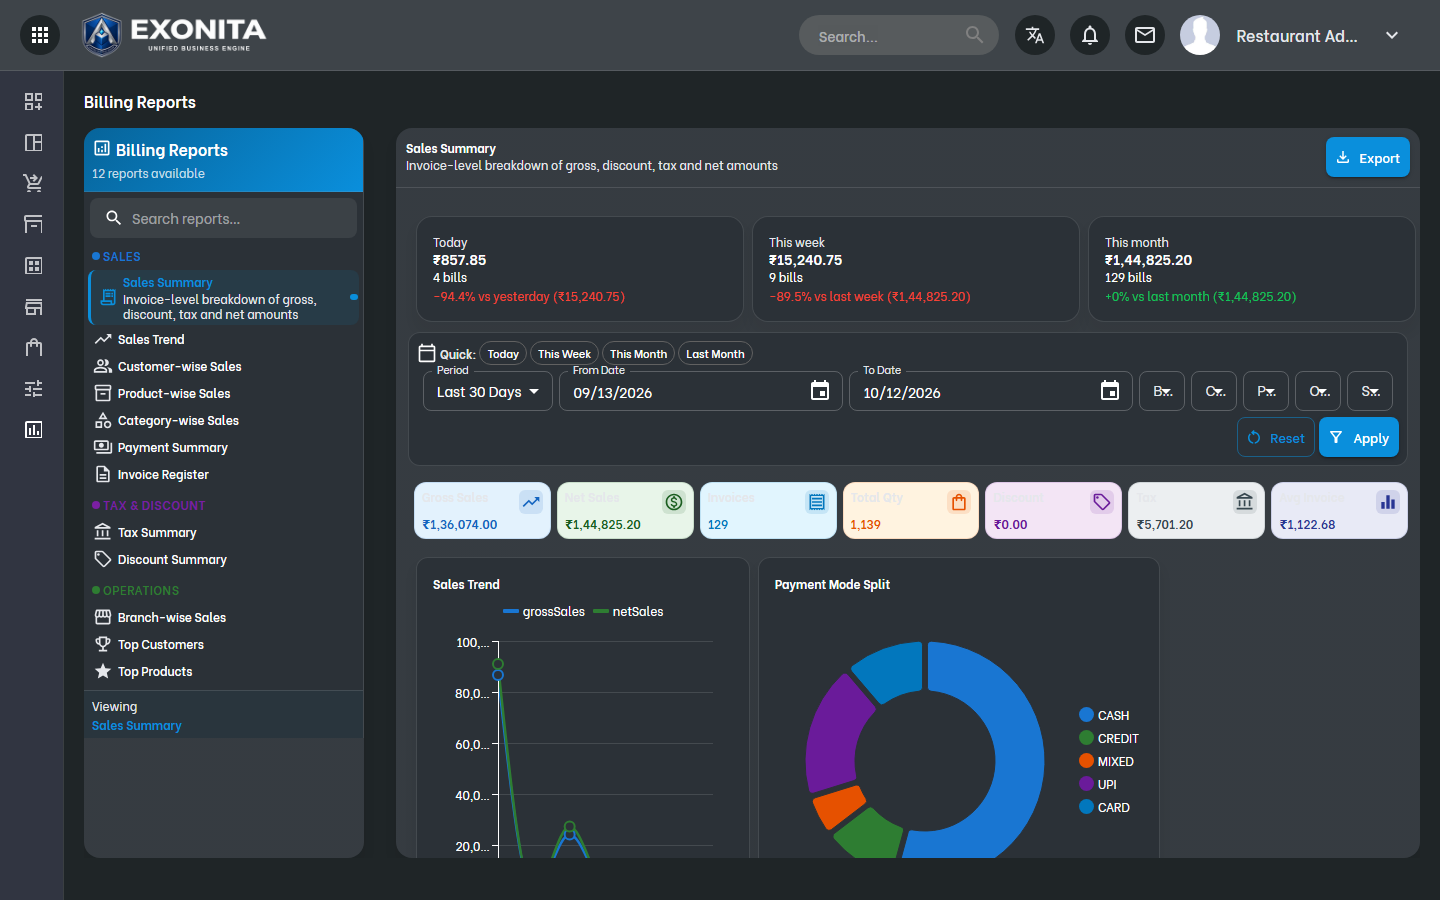
Open Reports and choose a report. Set the dates and branch, then download or share it.
You'll see: The report opens with your filters.
-
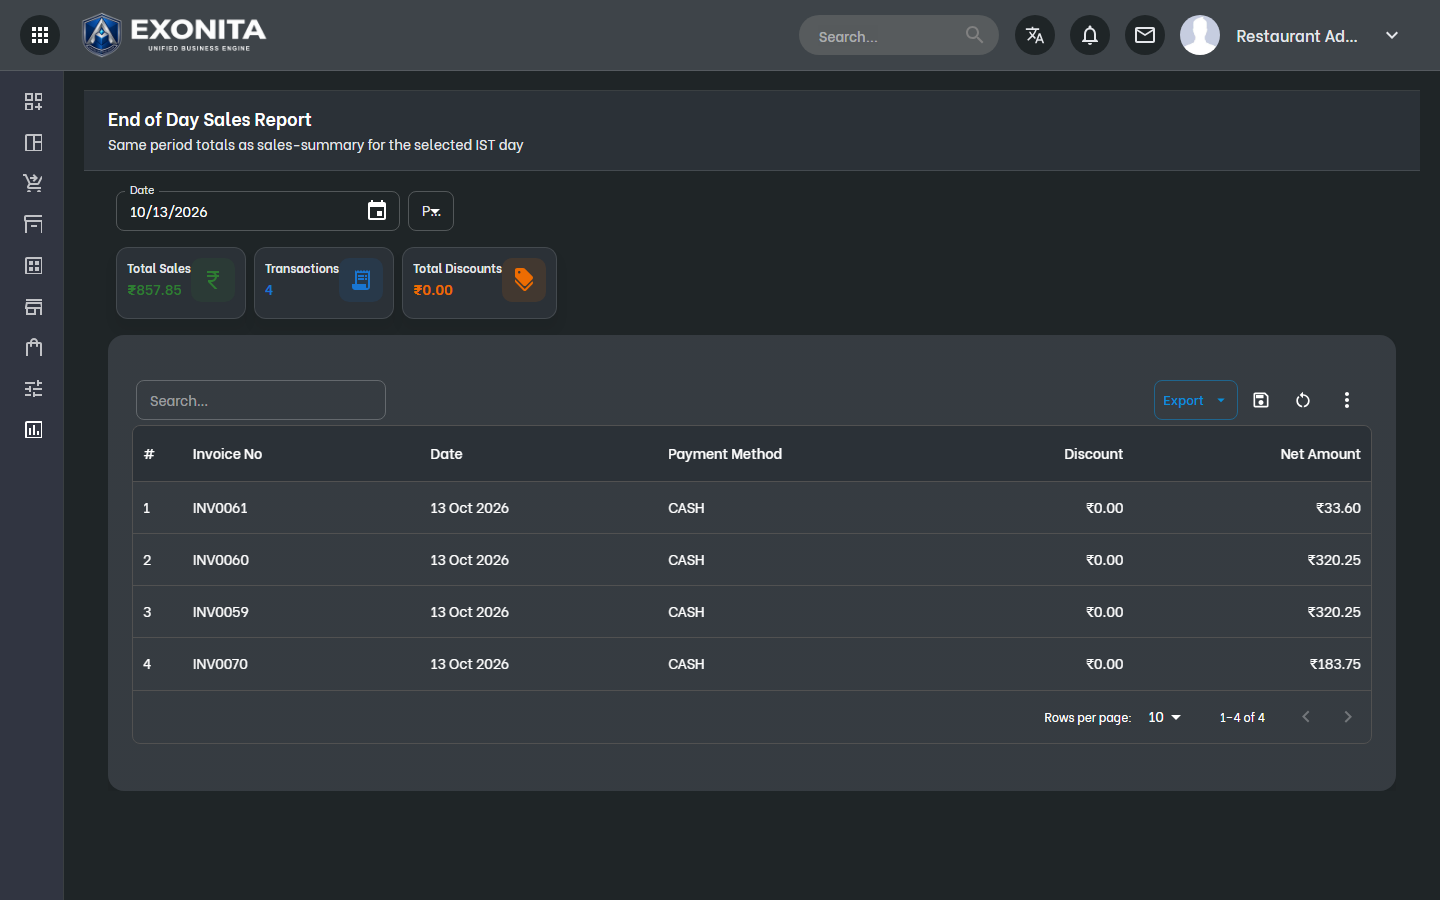
Open the EOD report for the day's totals by payment mode, tax and cashier.
You'll see: Use it to check the day before you close it.